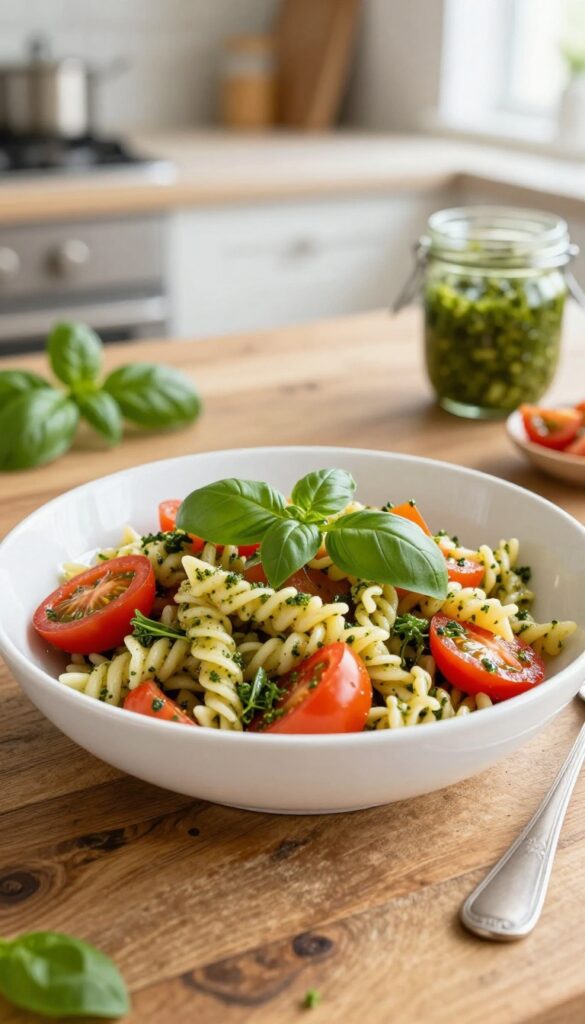
There are pasta salads, and then there's this basil pesto pasta salad with tomatoes. It's the kind of dish that disappears fast at every gathering, and honestly, I'm not surprised. The combination of al dente pasta, sweet cherry tomatoes, and a vibrant homemade pesto is simply irresistible.
I first made this for a summer barbecue, and it was such a hit that now I'm asked to bring it everywhere. The best part? It comes together in about 20 minutes with minimal fuss.
No complicated techniques or hard-to-find ingredients—just real, honest food that tastes amazing. Whether you're hosting a party, heading to a potluck, or just want a satisfying meal prep option, this salad delivers. It's versatile, forgiving, and packed with
Why You’ll Love This Recipe

This pasta salad is the kind of dish that works for nearly any gathering. It comes together fast, feeds a crowd, and only gets better as it sits—making it a perfect choice for picnics, potlucks, or backyard parties.
The pesto coats every piece of pasta evenly, so you get bold, herby flavor in each bite without needing a heavy dressing. It's ready in under 30 minutes with minimal prep, and the ingredients are flexible enough to adapt to what you have on hand. Add grilled chicken for extra protein, swap the cheese, or use gluten-free pasta—it all works.
Another reason this recipe shines for parties: it travels well. The flavors actually meld and deepen after an hour or two in the fridge, so you can make it ahead without worrying about it drying out or getting soggy. Serve it at room temperature straight from the bowl, and watch it disappear.
Ingredients You’ll Need
Before we dive in, let's talk about what goes into this pasta salad. The ingredient list is short and straightforward, but a few smart swaps can make it your own.
For the pesto, fresh basil is non-negotiable—it's the star of the show. Pine nuts give a classic flavor, but walnuts or even almonds work beautifully and are more budget-friendly. If you're dairy-free, skip the Parmesan or use a vegan alternative; the pesto will still be delicious.
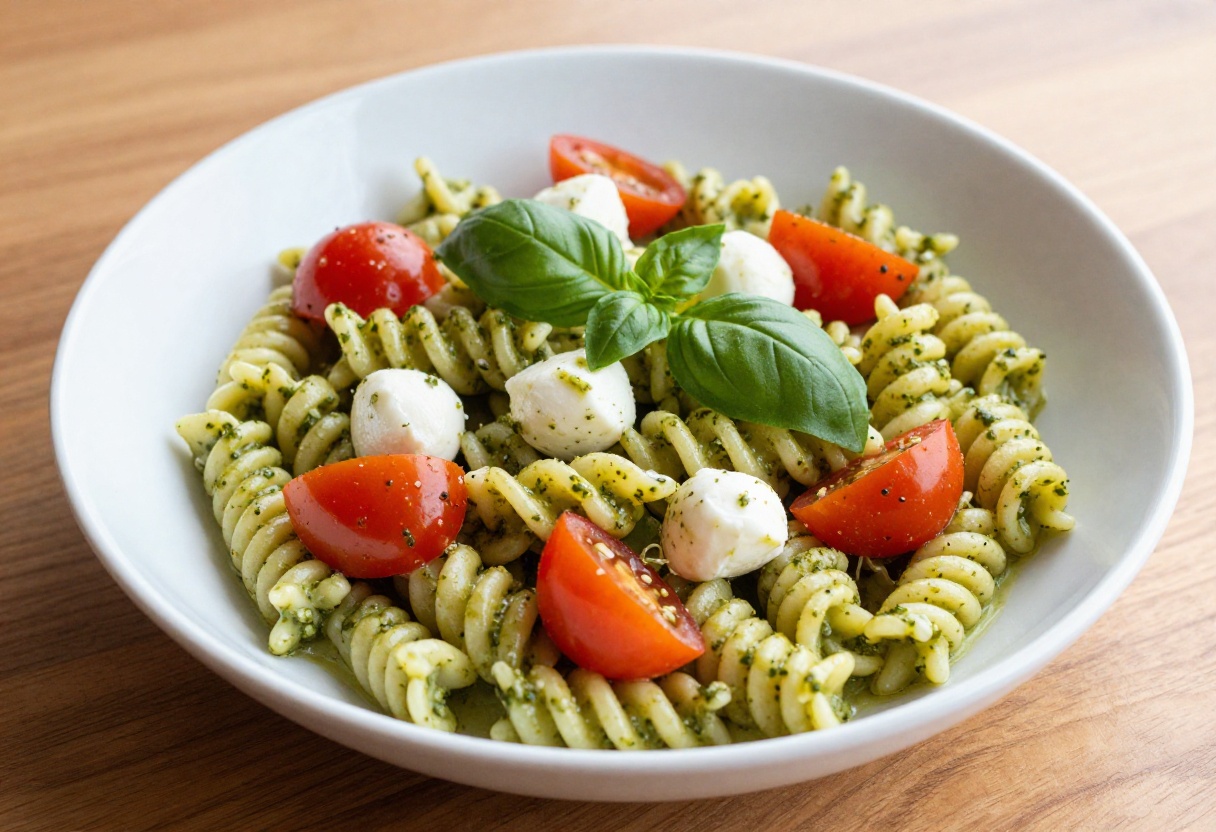
For the salad, cherry tomatoes add sweetness and color; grape tomatoes are a fine substitute. Mozzarella pearls are optional but add a creamy bite—if you use them, add them just before serving so they don't get soggy. Short pasta like fusilli or rotini holds onto the pesto best; avoid long strands or delicate shapes.
Step-by-Step Instructions
Alright, let's walk through this together. The process is simple and moves quickly, so I'll break it into clear steps. You'll have a gorgeous pasta salad ready in no time.
Step 1 – Cook the Pasta
Bring a large pot of generously salted water to a rolling boil. Add your short pasta—fusilli or rotini work great because their spirals catch the pesto—and cook according to the package directions until al dente. You want it tender but with a little bite, since it will soften slightly as it sits.
Drain the pasta in a colander and rinse it under cold running water to stop the cooking process and cool it down quickly. Shake off any excess water and set aside.
Step 2 – Make the Fresh Pesto
While the pasta cooks, whip up the pesto. In a food processor, combine the fresh basil leaves, pine nuts (or walnuts if that's what you have), grated Parmesan cheese, and peeled garlic cloves. Pulse a few times to chop everything together.
Then, with the motor running, slowly drizzle in the extra-virgin olive oil until the mixture becomes a smooth, vibrant green sauce. Stop to scrape down the sides once or twice. Season with salt and freshly ground black pepper to taste—start with a pinch of each and adjust later.
Step 3 – Combine Pasta and Pesto
Transfer your cooled pasta to a large mixing bowl. Spoon all of the fresh pesto over the top. Using a rubber spatula or wooden spoon, toss everything together until every piece of pasta is evenly coated in that herby, garlicky goodness.
Take your time here—you want each spiral or ridge to be glistening with pesto.
Step 4 – Add Tomatoes and Mozzarella
Now gently fold in the halved cherry tomatoes and, if you're using them, the fresh mozzarella pearls. Be careful not to crush the tomatoes or break up the cheese too much; you want nice pops of color and texture throughout. The sweet acidity of the tomatoes balances the rich pesto beautifully.
Step 5 – Season and Garnish
Give the salad a taste. Adjust with more salt or pepper if needed—sometimes a little extra salt wakes up all the flavors. Tear a few fresh basil leaves over the top for garnish.
This salad is best served at room temperature or slightly chilled, so you can pop it in the fridge for 15 minutes if you like it cool. Then dig in!
Tips for the Best Results
Getting this pasta salad just right comes down to a few simple tricks. The texture of the pasta and the brightness of the pesto make all the difference, so let's walk through what to keep in mind.
Don't overcook the pasta—al dente is key so it holds up in the salad. Rinse the pasta with cold water immediately after draining to stop cooking and cool it quickly. For the pesto, toast the pine nuts lightly in a dry pan for extra depth.
If making ahead, reserve a little pesto to toss in just before serving to refresh the flavor. Let the salad sit for 10-15 minutes after mixing so the flavors meld.
Common Mistakes to Avoid
- Overcooking the pasta: Mushy pasta turns into a gluey mess. Cook until al dente and rinse with cold water right away.
- Skipping the cold rinse: If you don't rinse, the pasta keeps cooking and gets sticky. Cold water stops it and cools it fast.
- Using a dull knife for tomatoes: A sharp blade gives clean cuts without squishing the tomatoes, keeping them juicy and intact.
- Adding all the pesto at once if making ahead: Toss with most of the pesto, then stir in a spoonful just before serving for a fresh burst of flavor.
Easy Variations and Substitutions
One of the best things about this pasta salad is how easily it adapts to what you have on hand or your dietary needs. Here are a few simple swaps to make it your own.
If pine nuts are a bit pricey, toasted walnuts or almonds work beautifully and add a nice crunch. For a different flavor profile, swap the fresh cherry tomatoes for sun-dried tomatoes (oil-packed, then drained) — they bring a sweet, concentrated taste. To turn this into a heartier meal, toss in grilled chicken, shrimp, or chickpeas for protein.
For a dairy-free version, skip the Parmesan and use nutritional yeast instead; it adds that savory, cheesy note without the dairy. Gluten-free pasta works perfectly here — just cook it al dente and rinse well. Want more greens?
Stir in a handful of arugula or spinach right before serving for a peppery kick and extra nutrients.
How to Store and Reheat
Store leftovers in an airtight container in the fridge for up to 4 days. This salad is best served cold or at room temperature, so no need to reheat. If it seems dry after chilling, stir in a drizzle of olive oil or a splash of lemon juice to revive it.
Avoid freezing as the texture of the pasta and tomatoes will suffer.
How to Store It
Transfer any leftover pasta salad to an airtight container and press a piece of plastic wrap directly onto the surface before sealing the lid. This helps prevent the pesto from oxidizing and keeps the salad from drying out. Refrigerate for up to 4 days.
Before serving, give it a good stir and check the seasoning—chilled food often needs a little extra salt or acid.
How to Reheat It
Honestly, this salad is meant to be enjoyed cold or at room temperature, so reheating isn't necessary. If you prefer a warmer dish, microwave individual portions in 15-second bursts on low power, stopping as soon as it's barely warm—overheating will wilt the basil and make the tomatoes mushy. For best results, let it sit at room temperature for 10–15 minutes before serving instead of using heat.
Frequently Asked Questions
Can I use store-bought pesto instead of homemade?
Absolutely. Store-bought pesto works fine in a pinch, but homemade gives you brighter flavor and control over oil and salt. If using jarred, look for one with basil as the first ingredient and avoid brands with too much cheese or filler.
What pasta shape works best for this salad?
Short shapes like fusilli, rotini, farfalle, or penne are ideal because they catch the pesto and tomatoes in their nooks. Avoid long noodles like spaghetti—they don't mix as well with chunky add-ins.
How do I keep the pasta from getting mushy?
Cook it al dente according to package directions, then rinse under cold water immediately to stop cooking. Toss with a little olive oil after draining to prevent sticking. Overcooked pasta will turn soft and break apart.
Can I make this salad ahead of time?
Yes, it's great for meal prep. Assemble everything up to 24 hours in advance, but add the fresh basil and a splash of lemon juice just before serving to keep it vibrant. Stir well before serving to redistribute the pesto.
Is this recipe dairy-free or vegan?
It can be. Use a dairy-free pesto (look for one without Parmesan) or make your own with nutritional yeast instead of cheese. Skip the mozzarella or use a vegan mozzarella alternative.
The rest of the ingredients are naturally plant-based.
Basil Pesto Pasta Salad with Tomatoes
Ingredients
Method
- Bring a large pot of salted water to a boil. Cook pasta according to package directions until al dente. Drain and rinse under cold water to stop cooking. Set aside.
- While pasta cooks, make the pesto: In a food processor, combine basil, pine nuts, Parmesan, and garlic. Pulse while slowly drizzling in olive oil until smooth. Season with salt and pepper.
- In a large bowl, toss the cooled pasta with the pesto until every piece is well coated.
- Gently fold in the cherry tomatoes and mozzarella pearls (if using).
- Taste and adjust seasoning with more salt or pepper if needed. Garnish with fresh basil leaves.
- Serve at room temperature or chilled. Enjoy!
Conclusion
This basil pesto pasta salad with tomatoes is everything you want in a party dish: easy, flavorful, and loved by everyone. It's become my go-to for any gathering because it never fails to impress without causing stress. I hope you give it a try and make it your own.
Whether you stick to the classic version or experiment with add-ins, I'm sure it'll become a favorite in your kitchen too. Happy cooking!

Dr. Pallab Kishore, MS in Orthodontics and owner of Orthodontic Braces Care, shares expert tips on braces, aligners, and oral health from 10+ years of experience.
