There’s something about a cold, crunchy cucumber salad that just screams summer picnic. But so many versions turn into a watery mess before you even spread out the blanket. Not this one.
This cool garlic cucumber salad is built to travel. It stays crisp, stays flavorful, and actually gets better after a few hours in the fridge. The secret?
A smart salting step and a bold garlic dressing that clings to every slice. Whether you’re packing for a park outing, a backyard barbecue, or just a week of easy lunches, this recipe delivers. It’s refreshing, punchy, and exactly what you want on a warm day.
Why You’ll Love This Recipe
This salad is designed for real life. It holds up for hours without getting soggy, thanks to a quick salt-and-rest step that draws out excess moisture. The garlic dressing is bold but balanced—tangy from vinegar, smooth from olive oil, and just a little sweet.
It’s also incredibly easy to scale up for a crowd. And since it’s made ahead, you can focus on enjoying the picnic instead of last-minute chopping.
Ingredients You’ll Need
Let's gather what you'll need. The beauty of this salad is that it relies on a handful of fresh, punchy ingredients that come together in minutes.
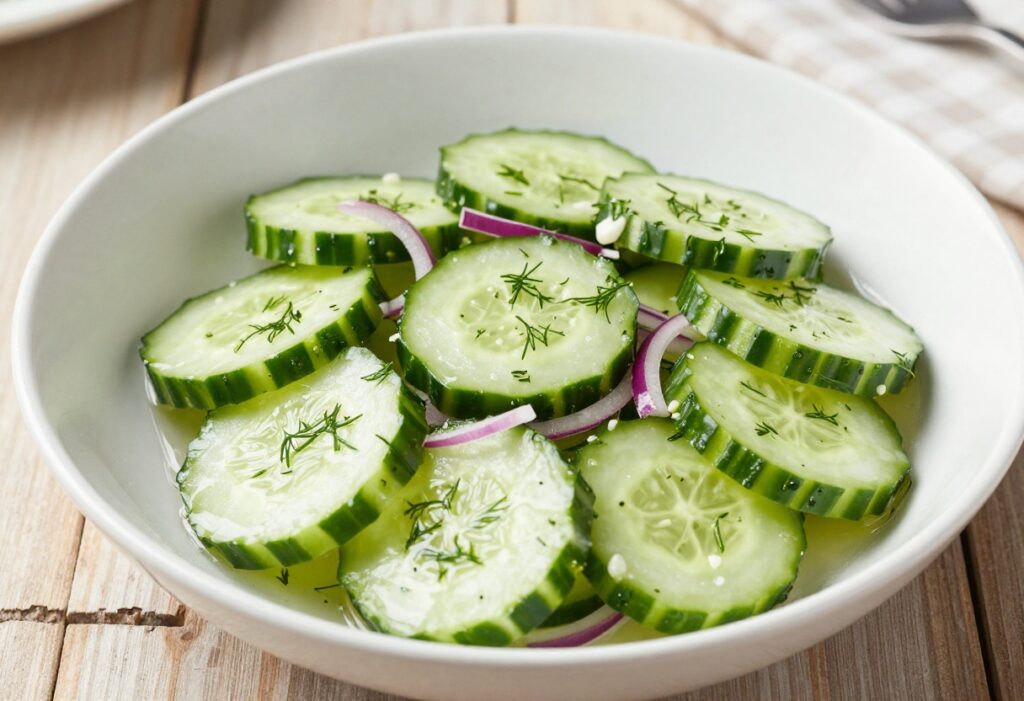
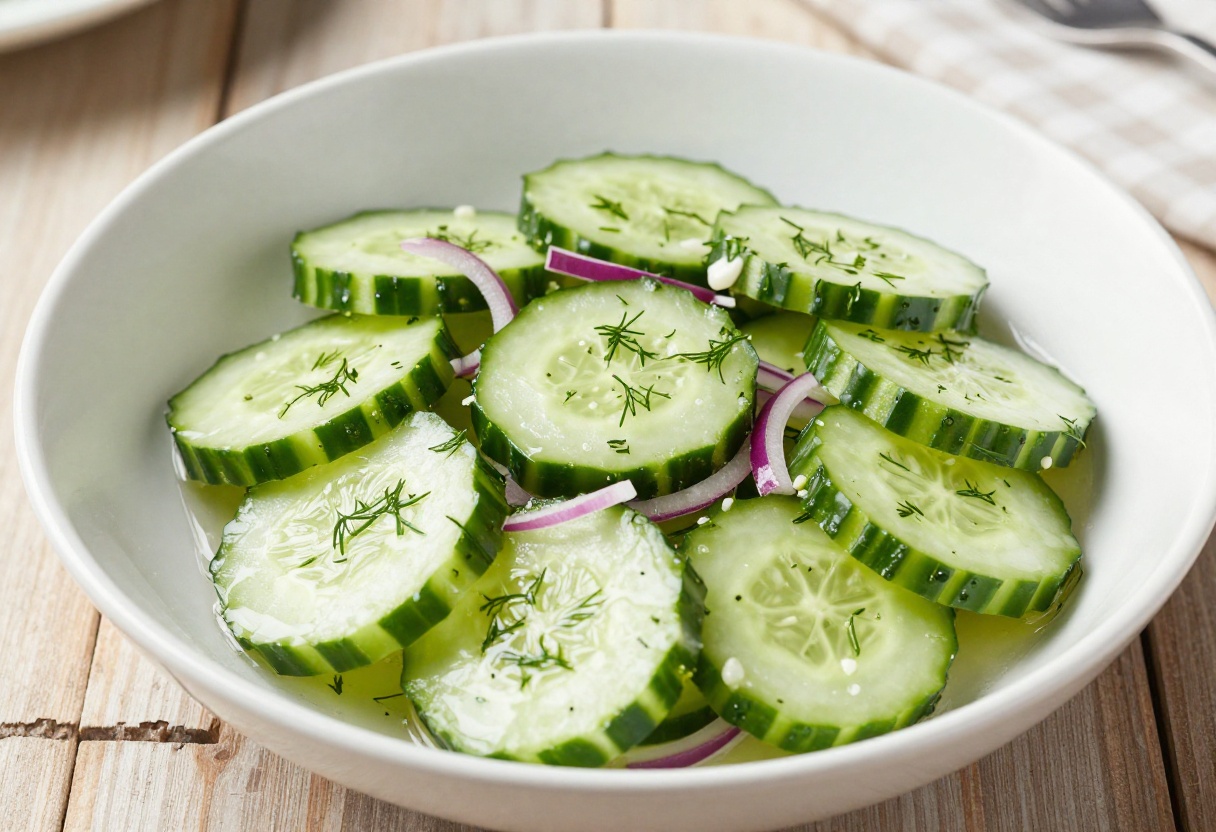
Start with 4 medium English cucumbers (or 6 Persian cucumbers) — their thin skins and minimal seeds mean no peeling required. Slice them into ¼-inch rounds for the perfect crunch-to-dressing ratio. You'll also need 1 teaspoon fine sea salt for drawing out excess moisture, 3 cloves of minced garlic, 2 tablespoons red wine vinegar, 1 tablespoon white sugar to balance the tang, ¼ cup extra-virgin olive oil, ¼ teaspoon black pepper, and 2 tablespoons fresh chopped dill.
If you like a little extra bite, toss in ¼ cup thinly sliced red onion (optional but recommended). That's it — no obscure ingredients, just simple, flavorful staples.
Step-by-Step Instructions
Now that everything is prepped, let's walk through the simple process that turns these everyday ingredients into a picnic-ready salad. The key is giving the cucumbers time to shed their water so the dressing clings perfectly.
Step 1 – Salt and Drain the Cucumbers
Place the sliced cucumbers in a colander set over a bowl. Toss them with the salt, making sure every round gets a light coating. Let them rest for 20 minutes.
You'll see beads of moisture form on the surface, and liquid will pool in the bowl below. This step is non-negotiable if you want a crisp, non-watery salad.
Step 2 – Make the Dressing
While the cucumbers drain, whisk together the minced garlic, red wine vinegar, sugar, olive oil, and black pepper in a large bowl. Keep whisking until the sugar fully dissolves — about 30 seconds. The dressing should look emulsified and smell sharp and sweet.
Set it aside to let the garlic infuse.
Step 3 – Pat the Cucumbers Dry
After 20 minutes, dump the salted cucumbers onto a clean kitchen towel or a double layer of paper towels. Gently pat them dry, pressing lightly to absorb any surface moisture. Don't skip this — even a little leftover water will dilute the dressing and make the salad soggy.
Step 4 – Combine Everything
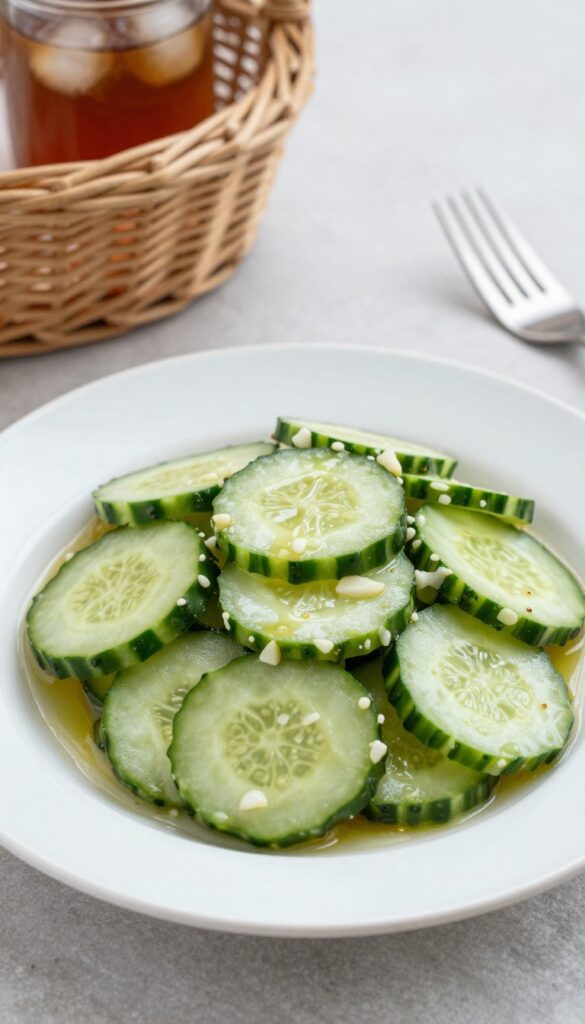
Add the dried cucumbers, fresh dill, and red onion (if using) to the bowl with the dressing. Toss well with a rubber spatula or large spoon until every slice is evenly coated. The dressing should cling to the ridges of the cucumber rounds.
Step 5 – Chill and Serve
Cover the bowl with plastic wrap or a lid and refrigerate for at least 30 minutes. This resting time lets the flavors meld and the cucumbers absorb the garlic and vinegar. Just before serving, give the salad a good stir to redistribute the dressing that may have settled.
Tips for the Best Results
Getting the perfect garlic cucumber salad is all about a few small but crucial steps. The good news is that once you know them, you'll nail it every time. Here's what makes the biggest difference.
Don't skip the salting step—it's the key to a non-watery salad. Use English or Persian cucumbers; they have thinner skins and fewer seeds. If using regular garden cucumbers, peel them first.
For the best flavor, let the salad marinate for at least an hour. Taste before serving and adjust salt or vinegar if needed. If making a day ahead, add fresh dill just before serving for brightest color.
Common Mistakes to Avoid
- Skipping the salting and draining step: This is the single most important step for a crisp, non-soggy salad. Even a few minutes makes a difference.
- Using wax-coated or thick-skinned cucumbers: They can be bitter and tough. Stick with English or Persian cucumbers, or peel standard ones.
- Adding dill too early if storing overnight: Fresh dill wilts and darkens. Stir it in just before serving for the best color and flavor.
- Skipping the resting time after dressing: The salad needs at least 30 minutes in the fridge for the flavors to meld. Patience pays off.
- Overdressing: You can always add more dressing, but you can't take it away. Start with the amount listed and adjust to taste.
Easy Variations and Substitutions
The base recipe is a fantastic starting point, but you can easily tweak it to suit what you have on hand or to explore new flavors.
For the vinegar, red wine is classic, but apple cider or white balsamic bring a fruitier tang. Swap the sugar with honey or maple syrup for a more complex sweetness. If you like heat, add a pinch of red pepper flakes or a thinly sliced jalapeño.
The dill is wonderful, but fresh mint or parsley make refreshing alternatives, especially with mint for a cooler vibe. For a creamier texture, stir in two tablespoons of Greek yogurt or a dollop of sour cream just before serving—this turns it into a tangy, almost ranch-like salad. The recipe is already vegan, so no changes needed there.
You can also add thinly sliced radishes or bell peppers for extra crunch and color.
How to Store and Reheat
This salad is best enjoyed within a few days, and proper storage keeps it refreshingly crisp. Because it's served cold, there's no reheating needed—just a quick refresh if it's been sitting.
How to Store It
Transfer any leftovers to an airtight container and refrigerate for up to 3 days. The salad will continue to absorb the dressing, deepening the garlic and dill flavors, though the cucumbers may soften slightly. If you're meal-prepping for a picnic, you can make it a day ahead—just wait to add the fresh dill until right before serving for the brightest flavor.
Avoid freezing; the cucumbers will turn mushy and watery when thawed.
How to Reheat It
No reheating required! Serve cold straight from the fridge. If the salad seems a bit dry after a day or two, drizzle a splash of extra-virgin olive oil and a teaspoon of red wine vinegar over the top, then toss gently.
This revives the dressing and restores brightness without making it soggy.
Frequently Asked Questions
Can I make this salad ahead of time for a picnic?
Yes, this salad actually gets better after a few hours in the fridge. The flavors meld together, and the cucumbers remain crisp if you salt them first. Prepare it up to 24 hours in advance, but add the fresh herbs just before serving for the brightest flavor.
How do I keep the cucumbers from getting watery?
Salting the cucumber slices and letting them sit for 15–20 minutes draws out excess moisture. After that, pat them dry with a paper towel before adding the dressing. This step is key for a non-soggy salad that travels well.
Can I use English cucumbers instead of regular ones?
Absolutely. English cucumbers have thinner skin and fewer seeds, so you don't need to peel or seed them. They're a great choice for a more delicate texture.
Just slice them as directed and proceed with the recipe.
Is this salad vegan?
The base recipe is vegan as written, using olive oil, vinegar, garlic, and herbs. Just double-check that your vinegar is vegan-friendly (most are). If you add yogurt or honey as a variation, it would no longer be vegan.
What can I serve this salad with at a picnic?
This cool, garlicky cucumber salad pairs beautifully with grilled meats, sandwiches, wraps, or any picnic fare. It's especially good alongside spicy dishes like barbecue chicken or falafel, as the coolness balances the heat.
Cool Garlic Cucumber Salad for Picnics
Ingredients
Method
- Place sliced cucumbers in a colander set over a bowl. Toss with salt and let rest for 20 minutes to draw out excess moisture.
- In a large bowl, whisk together minced garlic, red wine vinegar, sugar, olive oil, and black pepper until sugar dissolves.
- Pat cucumber slices dry with paper towels to remove as much moisture as possible.
- Add cucumbers, dill, and red onion (if using) to the dressing. Toss well to coat evenly.
- Cover and refrigerate for at least 30 minutes before serving to allow flavors to meld. Stir once more just before serving.
Conclusion
This cool garlic cucumber salad is the kind of recipe you’ll come back to all summer. It’s simple, reliable, and packed with fresh flavor that only gets better as it sits. Whether you’re heading to a picnic or just need a quick side for dinner, it delivers every time.
Give it a try at your next outdoor meal—I think you’ll love how easy it is to make ahead and how much everyone enjoys that first crunchy, garlicky bite. Happy picnicking!

Dr. Pallab Kishore, MS in Orthodontics and owner of Orthodontic Braces Care, shares expert tips on braces, aligners, and oral health from 10+ years of experience.
