
Heavy, cakey makeup can feel like a mask by midday, especially when you're aiming for that effortless, skin-like finish. The trick isn't more product—it's smarter application and lighter textures that let your natural features shine through.
These 20 glow-up tips focus on hydration, strategic concealing, and cream-based formulas that blend seamlessly into the skin. You'll learn quick techniques like mixing foundation with moisturizer, placing blush higher for a lifted look, and using brown mascara for a softer gaze.
Pick a few that resonate with your routine, and you'll nail that fresh, daily glow without the extra effort.
1. Start with a Hydrated Canvas
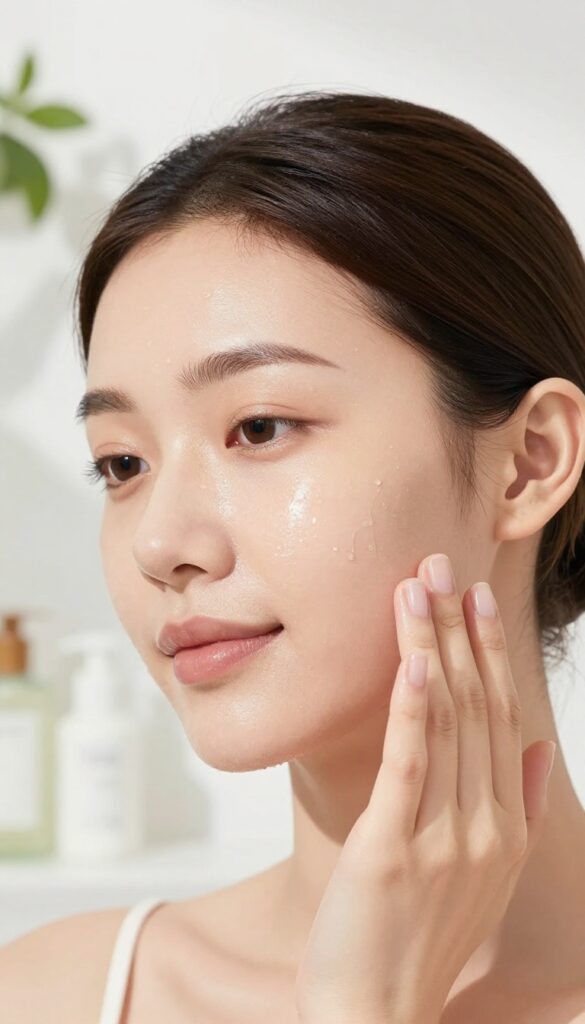
Think of your skin as the base for everything that follows. When it's thirsty, foundation can cling to dry patches and settle into fine lines. A quick hydration step makes a world of difference.
A lightweight moisturizer and a hydrating primer work together to smooth your skin's surface. They create a soft, supple base that helps makeup glide on evenly and stay put through your day. It's the simplest way to get that lit-from-within look.
Hydration is the secret to a natural, dewy finish. It plumps the skin, minimizes the look of pores, and prevents makeup from looking cakey. By prepping properly, you're setting the stage for a flawless, fresh-faced look.
Pick The Right Moisturizer
Choose a lightweight, water-based moisturizer that suits your skin type. Gel formulas work well for oily skin, while cream-gel hybrids are great for combination skin. Apply it to damp skin to lock in extra moisture.
Layer A Hydrating Primer
A hydrating primer adds an extra layer of smoothness. Look for ingredients like hyaluronic acid or glycerin. Focus on the center of your face where makeup tends to fade first.
Let it sit for a minute before applying foundation.
Don't Skip The Eye Area
The under-eye area is prone to dryness. Dab a little eye cream or a drop of facial oil there before concealer. This prevents creasing and keeps concealer from looking patchy.
2. Use a Damp Beauty Sponge for Foundation
Ever wondered why your foundation looks flawless in the mirror but patchy in photos? It's all about the tool. A damp beauty sponge is a game-changer for achieving that soft, fresh finish you're after.
It blends product into the skin rather than just sitting on top, so you get a natural, skin-like look every time.
Why Damp Works Better
When the sponge is damp, it doesn't soak up as much product as a dry one would. Instead, it pushes the foundation into your skin, creating a seamless, airbrushed effect. Plus, the moisture helps sheer out the formula, so you get lighter coverage that still evens out your complexion.
How To Dampen It Right
Run your sponge under water until it's fully saturated, then squeeze out the excess. You want it to be damp, not dripping. Wrap it in a towel and press to remove any leftover water.
The goal is a sponge that's about 70% dry, so it's still soft and bouncy but not leaving wet streaks on your face.
Bounce, Don't Drag
The key to a flawless finish is to use a bouncing motion, not a wiping one. Gently press the sponge into your skin, rolling it slightly as you go. This helps the foundation melt into your pores and fine lines, giving you that smooth, blurred look.
Work in small sections, starting from the center of your face and blending outward.
3. Mix Foundation with Moisturizer for Sheer Coverage
Some days your skin just doesn't want a full face of foundation. It might feel dry, or you're running late, or you simply want that 'my skin but better' vibe. Mixing foundation with moisturizer is the shortcut that gives you a tinted veil of color—enough to even things out, but light enough to let your real skin show through.
This trick works with any foundation you already own, from full-coverage formulas to lighter tints. The ratio is flexible: start with one part foundation to two parts moisturizer, then adjust based on how much coverage you want. The result is a hydrating, skin-like finish that never looks masky or heavy.
Why This Combo Works So Well
Moisturizer thins out the foundation, making it easier to blend and less likely to settle into fine lines or dry patches. It also adds a subtle glow, so your skin looks fresh and dewy without needing a separate highlighter. Plus, it's a great way to use up a foundation that's slightly too thick or matte for your taste.
How To Get The Perfect Mix
Squeeze a pea-sized amount of foundation onto the back of your hand, then add about twice as much moisturizer. Use a fingertip or a small spatula to mix them together until the color is uniform. Apply with your fingers or a damp sponge, pressing the product into your skin for a seamless finish.
When To Skip This Trick
If you need serious coverage for a blemish or dark circles, this combo won't cut it—save it for days when your skin is in decent shape. It's also not ideal for very oily skin, since the extra moisture can make you look greasy by midday. In that case, use a mattifying primer underneath or swap the moisturizer for a gel-based one.
4. Conceal Only Where Needed
A full face of concealer can quickly turn into a mask, especially when you're layering it everywhere. The goal is to spot-treat, not to repaint your entire complexion. By applying concealer only where you truly need it, you let your skin's natural texture and tone peek through, giving you that fresh, lit-from-within look.
Think of concealer as your secret weapon for specific spots, not a base for your whole face. Start by dabbing a tiny amount under your eyes in an inverted triangle shape, then blend with your ring finger or a small brush. For blemishes, use a precise brush to target just the pimple, leaving the surrounding skin bare.
This targeted approach keeps your face looking like skin, not a painted canvas.
The Spot-treat Method
Instead of swiping concealer across your entire under-eye area, focus on the darkest point—usually the inner corner. Use a small, pointed brush to place a dot of concealer there, then blend outward with a damp sponge. For blemishes, apply a tiny amount directly on the spot and feather the edges.
This way, you're only covering what needs it, and the rest of your skin breathes.
Blend Like A Pro
The secret to a natural finish is blending. Use a damp beauty sponge or your fingertips to gently pat the concealer into your skin, never rubbing. The warmth of your fingers helps melt the product for a seamless finish.
For under-eye coverage, use a tapping motion to avoid pulling the delicate skin. The result? Flawless coverage that looks like your skin, just better.
5. Set with a Light Dusting of Powder
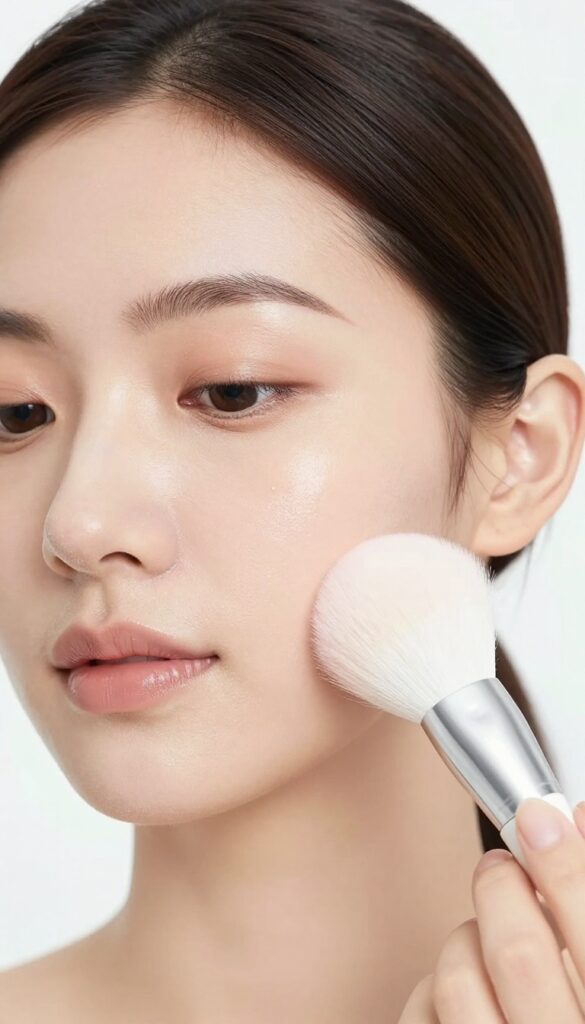
Powder can be a double-edged sword—too much and you lose that lit-from-within glow, too little and you're shiny by noon. The fix is all in the technique and placement. Instead of dusting your whole face, focus on the T-zone where oil tends to creep up first.
A fluffy brush with a light hand keeps the rest of your skin looking dewy and fresh.
The goal is to control shine without flattening your natural radiance. By applying powder only where you need it, you let your cheekbones and the high points of your face catch the light. This creates a soft-focus effect that looks like your skin, only better.
Choose The Right Powder
Stick with translucent powders—they won't add color or weight. Look for finely milled formulas with a silky texture that blur pores without looking cakey. Loose powders give a lighter finish, while pressed versions are easier for touch-ups on the go.
Use The Right Brush
A large, fluffy brush is your best friend here. Dip it lightly into the powder, tap off the excess, and press it gently onto your T-zone. Avoid sweeping motions, which can disturb your base.
Pressing sets the makeup and absorbs oil more effectively.
Know Your T-zone
Your T-zone includes your forehead, nose, and chin—areas that naturally produce more oil. If you're extra oily, add a touch to your eyelids too, but skip the rest of your face to keep that glow intact. Remember, less is more.
6. Cream Blush for a Natural Flush
Powder blush can sit on top of the skin and look a bit flat, especially when you're going for that fresh, just-woke-up glow. Cream blush is the opposite—it melts right in and looks like your skin, not like you're wearing makeup. The finish is dewy and soft, perfect for everyday wear.
The best part? It's nearly foolproof. You can apply it with your fingers, a sponge, or a brush, and it blends out in seconds.
No need for perfect precision—just a quick dab and blend and you're done.
Cream blushes come in a range of formulas, from balmy sticks to liquid tints. They're buildable, so you can go from a subtle hint to a more noticeable pop. The key is to apply in thin layers and blend quickly before it sets.
And because they're so skin-like, they're great for all skin types, even oily ones—just set with a light powder if needed.
How To Apply For A Lifted Look
Smile and find the apples of your cheeks, then apply a small dot of cream blush there. Blend upward toward your temples for a natural, lifted effect. This placement mimics a healthy flush and gives your face a subtle facelift.
Use your ring finger or a damp sponge for the most seamless blend.
Choosing The Right Shade
Pick a shade that matches your natural flush—think the color your cheeks turn after a brisk walk. For fair skin, soft pinks and peaches work well. Deeper skin tones can go for richer berries or terracotta.
If you're unsure, a sheer formula is more forgiving and easier to build.
Pro Tips For Long-lasting Wear
To keep your cream blush from fading, apply it after your base but before powder. Set with a translucent powder to lock it in. Or, layer a matching powder blush on top for extra staying power.
And if you want a dewy finish, skip the powder and let the cream shine through.
7. Place Blush Higher for a Lifted Effect
Blush placement can change your whole face shape in seconds. When you apply it too low, it drags your features down and makes you look tired. Lifting it up toward your temples gives an instant, natural facelift that brightens your entire expression.
The sweet spot is the apples of your cheeks, but slightly higher—almost where your cheekbone meets your ear. Use a light hand and blend upward toward your hairline. This trick works with any blush formula, but cream blushes are especially forgiving and melt into the skin beautifully.
Why Higher Placement Works
Your cheekbones naturally catch light at their highest point. By placing blush there, you mimic a youthful, lifted structure. It also balances your face, drawing attention upward and away from any tiredness around your mouth or jaw.
How To Find Your Spot
Smile to locate the apples of your cheeks, then move your finger about half an inch higher, toward your temple. That's your target. For a subtle effect, keep the color concentrated there and blend the edges with a damp sponge or clean fingers.
Cream Vs. Powder
Cream blush blends seamlessly and gives a dewy finish, perfect for a fresh daily look. If you prefer powder, apply it with a fluffy brush and tap off excess to avoid streaks. Either way, build slowly—you can always add more, but it's hard to take away.
Pro Tip For A Natural Finish
Set your blush with a tiny bit of translucent powder only if you're oily. Otherwise, leave it bare for that lit-from-within glow. And don't forget to blend a touch of the same blush on your eyelids or nose bridge for a cohesive, sun-kissed vibe.
8. Use a Brow Gel for Feathered Brows
Brows can make or break a fresh-faced look. When they're too drawn-on or stiff, they pull attention away from everything else. A tinted brow gel is the easiest way to keep them looking natural and polished without the extra effort.
Feathered brows are all about soft, upward strokes that mimic natural hair. A tinted gel adds just enough color to fill sparse areas while holding hairs in place. The result is a groomed but effortless finish that pairs perfectly with a dewy complexion.
Pick The Right Shade
Choose a tint that matches your natural brow hair, not necessarily your hair color. If you're between shades, go one shade lighter for a softer look. The goal is definition, not a harsh outline.
Brush Up And Out
Start at the inner corner and brush upward in short strokes. Follow the natural direction of your hair growth. For the tail, angle slightly outward to keep that feathered effect.
This simple motion lifts the brow and opens up your eyes.
Layer For More Definition
One coat gives a subtle tint, but you can build it up if you want more fullness. Apply a second layer once the first is dry, focusing on sparse areas. Avoid going over the same spot repeatedly to prevent clumping.
9. Cream Eyeshadow for Easy Blending
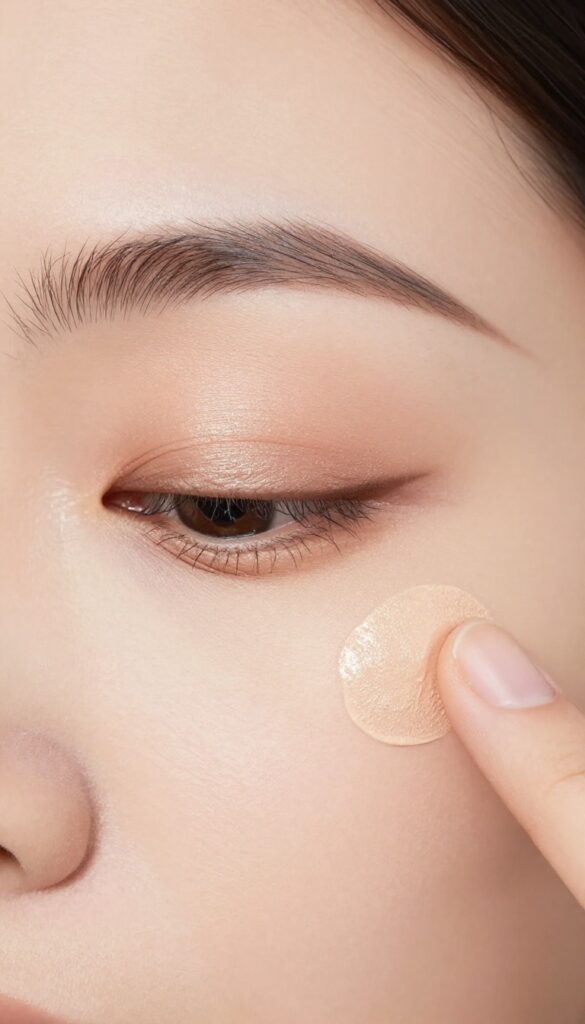
Powder eyeshadows can be tricky to blend, especially when you're in a hurry. Cream formulas, on the other hand, are practically foolproof—they melt into the skin and blend beautifully with just your fingertips. For a soft, everyday look, neutral shades like taupe, champagne, or soft brown are your best friends.
Cream eyeshadows are a game-changer for achieving a fresh, effortless eye look. They don't require brushes, they blend in seconds, and they give a dewy, skin-like finish that powders often miss. Plus, they're forgiving—even if you make a mistake, you can easily smudge it out with your finger.
Here’s how to make them work for you.
Why Cream Formulas Win
Cream eyeshadows are perfect for daily wear because they're quick and forgiving. They glide on smoothly and blend seamlessly, so you don't need any special skills. Plus, they double as a base for powder shadows, making colors pop and last longer.
Fingertip Blending Technique
The best tool for cream shadow is your ring finger—it's gentle and has the perfect surface area. Dab a small amount onto your lid, then pat and blend outward. The warmth of your finger helps the product melt into the skin for a natural, diffused look.
No brushes needed!
Shade Picks For Everyday Glow
For a soft, fresh finish, stick to neutral shades that mimic your skin tone but add a hint of warmth. Think soft taupes, warm beiges, or shimmering champagnes. These shades brighten the eyes without looking heavy, and they pair well with a simple swipe of mascara.
10. Tightline Your Upper Lash Line
Want the look of fuller lashes without the fuss of a winged liner? Tightlining is your secret weapon. It's a subtle technique that adds definition right at the root, making your lashes appear denser and your eyes more awake—perfect for a soft daily finish.
Tightlining is all about precision and a light hand. Here's how to nail it and why it works so well for a natural look.
What Is Tightlining?
Tightlining means applying liner to the upper waterline—the tiny area between your lashes and your eye. This hides the liner in the lash line, so you get definition without a visible line. It's like giving your lashes a boost from underneath.
How To Tightline Without Poking Your Eye
Use a gel or pencil liner with a creamy texture. Gently lift your chin and look down into a mirror. With your other hand, pull your upper lid slightly upward.
Then, dot the liner along the waterline, wiggling the tip between the lashes. Start with a few dots and connect them—no need to rush.
Why It Beats A Regular Liner For Daily Wear
A traditional line can look harsh and take time to perfect. Tightlining is quicker, smudge-proof (once set), and adds depth without changing your eye shape. It also makes your lashes look thicker, so you can skip heavy mascara if you want an even lighter feel.
11. Curl Lashes Before Mascara
Skipping the lash curler is like leaving your eyes half-awake. A quick squeeze before mascara opens up your whole face and makes you look more refreshed in seconds. It’s one of those tiny steps that makes a big difference, especially when you’re going for a soft, natural daily look.
No need for heavy falsies or dramatic extensions—just a simple curl to lift and define.
Curling your lashes before mascara is a game-changer for a fresh, awake appearance. It instantly makes your eyes look bigger and more alert, which is exactly what you want for a soft daily glow. Plus, it helps mascara grip better and prevents that straight, droopy look by the end of the day.
Why Curl First?
When you curl before applying mascara, you’re shaping the lash from the root, which gives a natural lift. Mascara alone can weigh lashes down, especially if it’s a volumizing formula. Curling first ensures your lashes stay lifted and defined all day long.
How To Get The Best Curl
Start with clean, dry lashes. Gently clamp the curler at the base and hold for about 10 seconds. Then, move it slightly upward and squeeze again for an extra lift.
For a more natural look, pulse the curler as you go—this avoids that harsh, crimped effect.
Don’t Forget To Warm It Up
A quick blast of warm air from your hairdryer on the curler’s pad can help set the curl longer. Just make sure it’s not too hot—test it on your wrist first. This little trick gives a more lasting curl, perfect for all-day wear.
12. Use a Brown Mascara for Softness
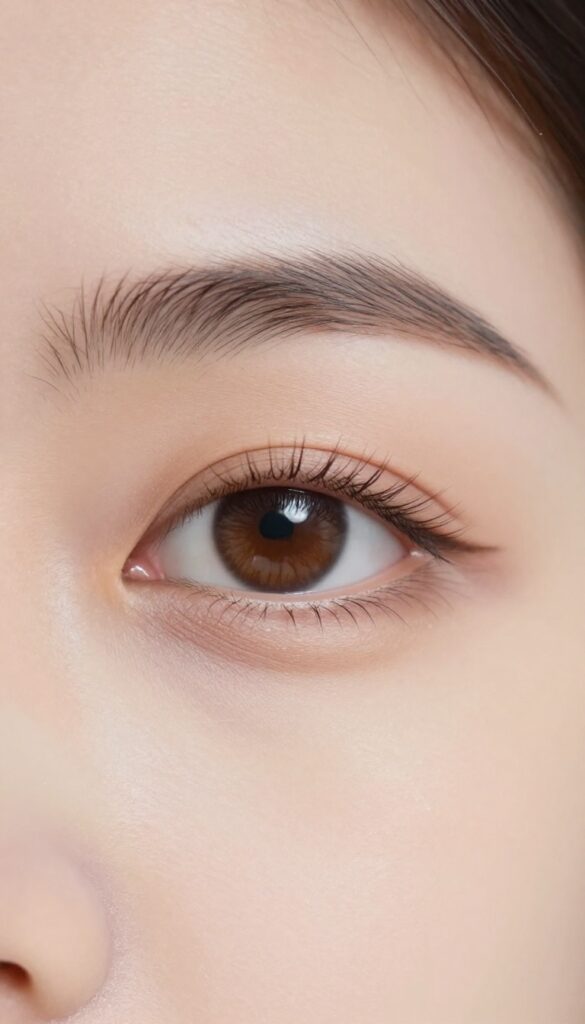
Black mascara can feel a bit harsh for a daytime look, especially if you have lighter features or want a more understated vibe. Brown mascara gives your lashes definition and length without the intensity, making your eyes look softer and more approachable. It's a simple swap that can change the whole feel of your makeup.
Brown mascara is a game-changer for anyone who wants a natural, fresh finish. It defines your lashes just enough to open up your eyes, but it doesn't compete with your other makeup or your natural coloring. Plus, it's forgiving if you're not a pro at applying mascara—any smudges look more like a soft shadow than a mistake.
Why Brown Works For Daytime
Black mascara can create a stark contrast that draws attention to your lashes, which might be too much for a soft, daily look. Brown mascara, on the other hand, blends seamlessly with your natural lash color, especially if you have lighter hair or skin. It gives you that 'my lashes but better' effect.
How To Choose The Right Shade
Look for a brown that has a hint of warmth—like a chestnut or taupe—rather than a flat, cool brown. If you have very fair lashes, a soft brown will look more natural. For deeper skin tones, a rich chocolate brown can still give you definition without going too dark.
Application Tips For A Natural Finish
Wipe off excess product before applying to avoid clumps. Start at the base of your lashes and wiggle the wand upward. For an even softer look, brush through your lashes with a clean spoolie afterward to separate them and remove any excess.
You can also apply just to the top lashes for a more subtle effect.
13. Highlight the High Points of Your Face
A subtle glow can make your skin look healthy and awake without any glitter or shimmer overload. The trick is placing highlighter only where light naturally hits—the high points of your face. This mimics a lit-from-within effect that reads as fresh, not shiny.
When you highlight the high points, you're essentially sculpting with light. It lifts the cheekbones, makes the nose look straighter, and adds a soft pout to the lips. The result is a natural, dewy finish that catches the light in all the right ways.
Where To Apply For A Natural Lift
Start with the tops of your cheekbones—that's the area that catches sunlight first. Then sweep a thin line down the bridge of your nose, and finish with a tiny dab on your cupid's bow. These three spots are all you need for a fresh, everyday glow.
Choosing The Right Formula
For a soft daily finish, skip chunky glitter powders and go for a cream or liquid highlighter. These blend seamlessly into skin and give a dewy sheen rather than a sparkly stripe. If you prefer powder, choose one with a fine, satin finish and apply with a fluffy brush.
The Blending Trick For A Seamless Finish
Use your ring finger or a damp sponge to press the highlighter into the skin. This melts the product into your base so there are no harsh lines. For a more subtle effect, mix a drop of liquid highlighter with your foundation and apply all over for an all-over radiance.
14. Use a Lip Tint or Stained Lip Balm
Finding a lip color that lasts through coffee, snacks, and conversations without constant touch-ups can feel like a win. Lip tints and stained balms give you that just-bitten flush of color while keeping your lips happy and hydrated. Unlike heavy lipsticks, they melt into your lips for a natural, lived-in look that fits right into your daily glow-up routine.
Why Tints Beat Lipstick For Daily Wear
Lip tints are lightweight and buildable, so you can go from a subtle wash to a more noticeable pop of color in seconds. They don't settle into fine lines or feel sticky, which makes them perfect for everyday wear. Plus, many formulas are infused with nourishing oils, so your lips stay soft without needing a separate balm.
How To Apply For A Soft, Natural Finish
Start with exfoliated, moisturized lips. Apply the tint to the center of your lips and press them together, then blend outward with your fingertip for a diffused, just-bitten look. For a more precise edge, use a lip brush, but for daily wear, finger-blending keeps it effortless and soft.
Picking The Right Shade For Your Skin Tone
For fair skin, rosy pinks and soft berries look natural. Medium skin tones can rock coral, peach, or rose shades. Deeper skin tones shine with rich plums, berries, and brick reds.
When in doubt, choose a shade that matches the natural color of your lips after you've been outside in the cold—that's your perfect 'your lips but better' hue.
15. Set Your Makeup with a Facial Mist
A facial mist is like a secret weapon for a fresh, dewy finish that lasts. It not only sets your makeup but also helps everything melt together, blurring any powdery or cakey spots. Plus, that refreshing spritz feels amazing, especially on a busy day.
Misting after your makeup adds a subtle glow and keeps your skin looking hydrated, not greasy. It's the final step that makes your makeup look like skin, not like makeup.
Choose The Right Mist
Not all mists are created equal. Look for a setting mist with hydrating ingredients like glycerin or aloe vera. Avoid ones with alcohol, which can dry out your skin and make your makeup look patchy.
How To Apply
Hold the bottle about 8-10 inches from your face and spritz in an X and T motion. This ensures even coverage. Let it dry naturally—don't fan it, or you'll disturb your makeup.
When To Mist
For a quick midday refresh, mist lightly over your makeup to revive your glow. You can also use it before applying powder to help it blend better.
16. Blend Your Neck and Jawline
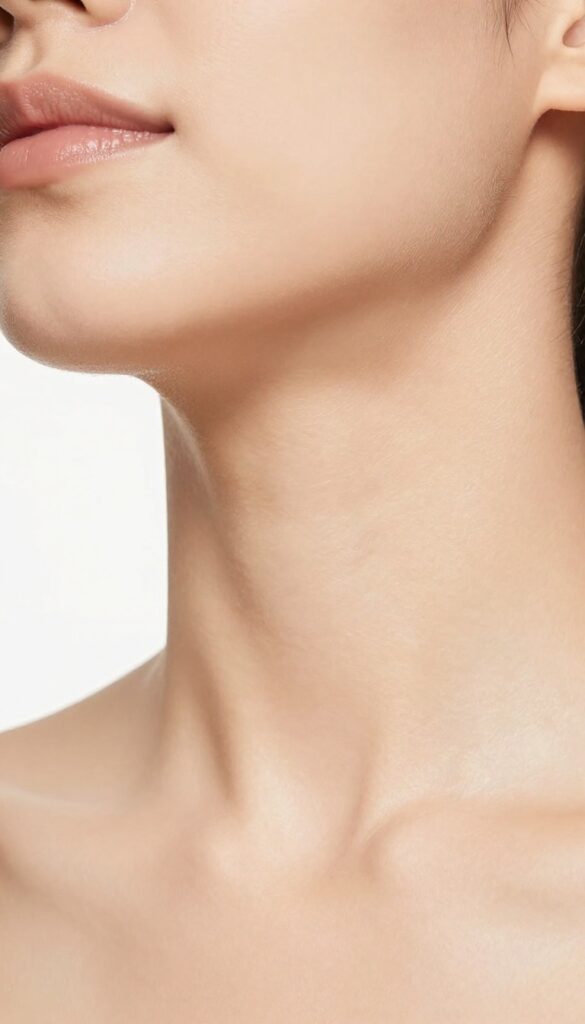
You might think you've mastered foundation, but if there's a visible line where your face meets your neck, the whole look falls apart. That harsh edge screams 'makeup' and ruins the soft, fresh vibe you're going for. Blending down is a small step that makes a huge difference.
The goal is a seamless transition from face to neck, so your skin tone looks naturally even. This trick is especially important if you're wearing a slightly different shade or using a fuller coverage foundation. A quick blend down the jawline and neck prevents that dreaded mask effect and keeps your glow looking effortless.
Why It Matters
When you don't blend down, you create a visible boundary that draws attention to your makeup. It can make your face look disconnected from your body, and it's a dead giveaway that you're wearing foundation. Blending down creates a more natural, unified look that feels lighter and more believable.
How To Do It Right
After applying foundation to your face, use a damp sponge or a brush to pull the product down your jawline and onto your neck. Use light, sweeping motions to soften any edges. You don't need to apply a lot of extra product—just blend what's already there.
For an even more seamless finish, set with a light dusting of translucent powder.
Pro Tips For A Flawless Finish
Choose a foundation that matches your neck, not your face, if they differ. When in doubt, go a shade lighter and blend down. Also, remember to blend your neck and jawline when applying bronzer or contour to avoid any harsh lines.
A quick check in natural light can save you from any obvious mismatches.
17. Use a Beauty Blender for Cream Products
Cream blush, bronzer, and highlighter can look streaky if you apply them with your fingers or a brush. A damp beauty blender changes the game by pressing the product into the skin for a seamless, airbrushed effect. This technique is a go-to for achieving that soft, fresh finish without any harsh lines.
Dampen your sponge until it expands, then squeeze out excess water so it's just damp, not dripping. Use a bouncing motion to blend cream products—this helps them melt into the skin rather than sitting on top. The result is a natural, lit-from-within glow that looks like your skin, just better.
Why Damp Matters
A damp sponge doesn't absorb as much product, so you use less and get more coverage. The moisture also helps creams glide on smoothly, preventing patchiness. It's the easiest way to make cream formulas look like a second skin.
The Bounce, Not Swipe
Swiping a sponge can move product around and cause streaks. Instead, bounce it gently over your cheeks, forehead, and nose. This stippling motion diffuses the color evenly, giving you that soft-focus effect without disturbing your base.
Layer For More Intensity
Start with a light layer and build up if you want more color. Because cream products are blendable, you can add a second pass without looking cakey. This control is perfect for a daily look that's fresh but still customizable.
18. Opt for a Skin Tint or BB Cream
Some days, you want coverage that feels like nothing at all. That's where skin tints and BB creams come in. They even out your complexion while letting your natural skin texture peek through, so you look fresh, not masked.
Skin tints and BB creams are the ultimate low-maintenance base. They give you a hint of color and blur imperfections without the weight of a full foundation. Perfect for mornings when you're short on time or just want your skin to breathe.
Find Your Match
Pick a shade that disappears into your skin. Test it on your jawline in natural light. If you're between shades, go lighter—it blends more seamlessly.
Apply With Fingers Or A Damp Sponge
Fingers warm the product and press it into skin for a natural finish. A damp sponge adds a dewy glow and sheers out the coverage even more. Either way, work in light layers.
Build Coverage Where Needed
Use a tiny bit of concealer on spots or under eyes after your tint. This keeps the look fresh while still covering what you want to hide.
19. Don't Forget Your Neck and Chest
You've perfected your face, but if your neck and chest are a different shade, the whole effect falls flat. It's a common miss that can make even the best makeup look obvious. The fix is simple: extend your base down a bit to create a seamless transition.
A quick sweep of leftover foundation or a touch of body shimmer can make a world of difference. It keeps your skin tone looking even and natural, especially in photos or when you're wearing a top that shows a little skin. Here’s how to do it without the mess.
Use What's Left On Your Brush
After applying foundation to your face, there's usually a little product left on your brush or sponge. Instead of washing it right away, blend that residue down your jawline and onto your neck. It's the easiest way to avoid a harsh line.
Add A Subtle Shimmer
For a soft, lit-from-within glow, mix a tiny drop of liquid highlighter with your moisturizer or body lotion. Rub it over your collarbones and chest. This catches the light and adds a healthy sheen without looking glittery.
Blend, Blend, Blend
The key is to blend everything downward in gentle strokes. Use a damp sponge or your fingers to work the product into your skin so there are no visible edges. You want it to look like your natural skin, just a little more even.
20. Keep a Blotting Paper Handy
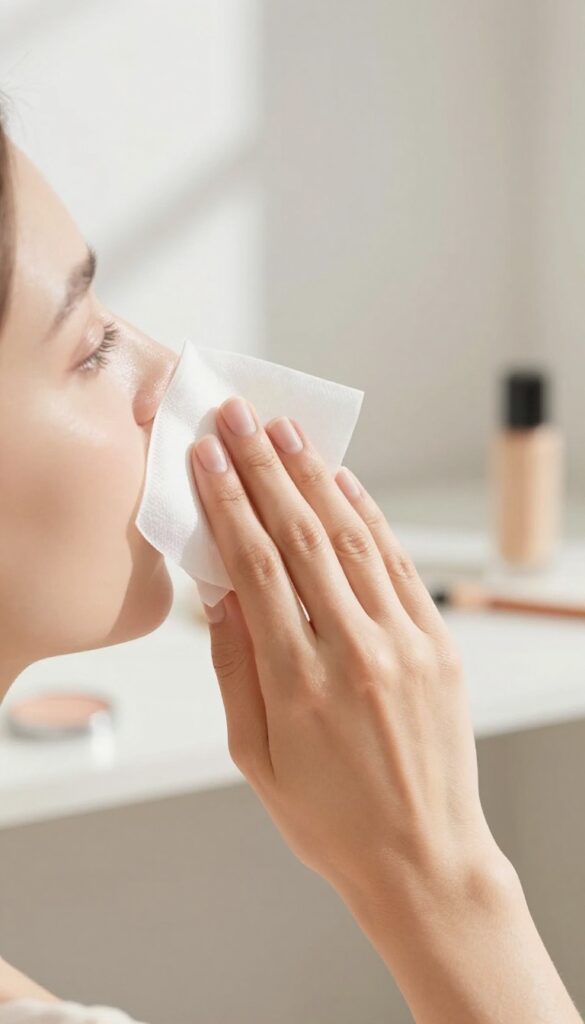
Midday shine can sneak up even on the most carefully applied makeup. Instead of reaching for powder and piling on more product, blotting papers offer a quick, mess-free fix that lifts oil without disturbing your base. These thin sheets are a lifesaver for touch-ups on the go.
They absorb excess sebum while leaving your makeup exactly as it is—no cakiness, no streaks. Tuck a pack in your bag and you'll always have a fresh-faced solution within reach.
Blotting papers are the unsung heroes of a soft, natural finish. Unlike powder, which can settle into fine lines and make skin look dry, blotting papers simply remove the oil that causes shine. They're perfect for the days you want to keep your makeup light and breathable.
Using them is straightforward: press the paper gently on shiny areas—your T-zone, chin, or anywhere else—and lift away. The paper absorbs the oil, not your makeup, so your look stays intact. It's a simple habit that keeps your glow looking healthy, not greasy.
Why Blotting Beats Powder
Powder can be a trap when you're aiming for a fresh finish. It adds texture and can make skin look flat. Blotting papers, on the other hand, remove the problem at the source.
They leave your skin's natural radiance intact while cutting the shine, so you get a dewy look without the oil slick.
How To Blot Without Smudging
The key is to press, not rub. Gently press the paper onto the oily area and hold for a few seconds. Then lift straight up.
Avoid dragging or swiping, which can move your makeup around. If you need more coverage, use a fresh sheet rather than pressing the same one repeatedly.
When To Reach For Blotting Papers
Use them whenever you feel that first hint of shine—mid-morning, after lunch, or before an evening event. They're also great for a quick refresh after a workout or a long commute. Keep a pack in your purse, desk, or car, and you'll never be caught off guard by an oily T-zone again.
FAQ
How do I make my makeup look less cakey?
Start with a well-hydrated face, use a damp sponge to apply foundation, and set only your T-zone with a light dusting of powder. Avoid layering too many products.
What's the best way to apply cream blush?
Smile to find the apples of your cheeks, then apply a small dot of cream blush and blend upward toward your temples with your fingers or a sponge for a natural flush.
Can I use brown mascara if I have dark lashes?
Absolutely! Brown mascara softens your look and is perfect for daytime. It adds definition without the harshness of black, especially if you have fair skin or light eyes.
How often should I clean my beauty sponge?
Ideally, clean your beauty sponge after every use to prevent bacteria buildup. If that's too much, at least wash it every few days with a gentle cleanser.
What's the difference between a skin tint and a BB cream?
Skin tints offer sheer, barely-there coverage and focus on evening out skin tone, while BB creams provide light coverage with added skincare benefits like hydration and SPF.
Conclusion
A soft, fresh daily finish doesn't come from a single miracle product—it comes from small, repeatable habits that work with your skin and routine. Pick two or three tips from this list that feel doable, and weave them into your mornings or evenings without overcomplicating things. Consistency will do more for that glow than any one-time overhaul.
Start where you are, keep it gentle, and let your natural radiance do the talking. Your best face is the one you show up with every day.