You know that awkward moment when you catch yourself smiling in the mirror and think, “Hmm… my teeth look more cappuccino than white”? Yeah, we’ve all been there.
The good news? You don’t need fancy whitening strips or an expensive dentist appointment to brighten things up.
Believe it or not, the humble box of baking soda hiding in your pantry has been helping people fight stains long before Instagram filters existed.
As a dentist who’s seen this trick work wonders (when used properly), I’ll walk you through how to make baking soda your wallet-friendly whitening buddy—minus the enamel damage.
Understanding Tooth Discoloration
Common Causes of Yellow Teeth
Ever noticed how your teeth looked brighter in old college photos? That’s not just the flash. Tooth discoloration happens gradually, and these are the usual suspects:
- Coffee, tea, and red wine: The holy trinity of surface stains.
- Smoking or chewing tobacco: Nicotine and tar leave stubborn yellow or brown patches.
- Sugary sodas and dark sauces: They’re sneaky stain-makers, too.
- Aging: As enamel thins, the yellowish dentin beneath becomes more visible.
- Poor oral hygiene: Skipping flossing or brushing lets plaque trap more stains.
How Baking Soda Works on Stains
Here’s the science bit—don’t worry, I’ll keep it fun. Baking soda (sodium bicarbonate) is mildly abrasive. Think of it as a super-fine scrub that gently lifts surface stains off your enamel without the sandpaper-level damage you might fear.
It’s also alkaline, which helps neutralize acids in your mouth. Less acid means fewer chances of enamel erosion and less yellowing over time.
Why Baking Soda Is a Popular Choice
- Budget-friendly: A box costs less than your morning latte.
- Easy to find: Grocery store? Check. Your kitchen cabinet? Double-check.
- History-approved: People used baking soda for oral care long before fancy toothpaste brands existed.
- Lower abrasion than you think: On the Relative Dentin Abrasivity (RDA) scale, baking soda is gentler than many whitening toothpastes.
Pro tip from me as a dentist: Baking soda is most effective on surface stains. If your teeth are darker due to genetics, trauma, or internal staining, this hack won’t give you Hollywood-level brightness.
Preparation Before You Start
Before you channel your inner DIY chemist, here’s what to keep in mind.
Check Your Oral Health
If you have sensitive teeth, gum disease, braces, crowns, or veneers, talk to your dentist first. Baking soda isn’t for everyone—especially if your enamel’s already worn thin.
Gather Your Tools
- Food-grade baking soda (the pure stuff, no added detergent—yes, I’ve seen that mistake)
- Soft-bristled toothbrush (so you don’t go all Hulk on your enamel)
- A small bowl and spoon for mixing
- Optional: hydrogen peroxide, coconut oil, or lemon juice—but we’ll get into why these are “use sparingly” ingredients.
Safety Check
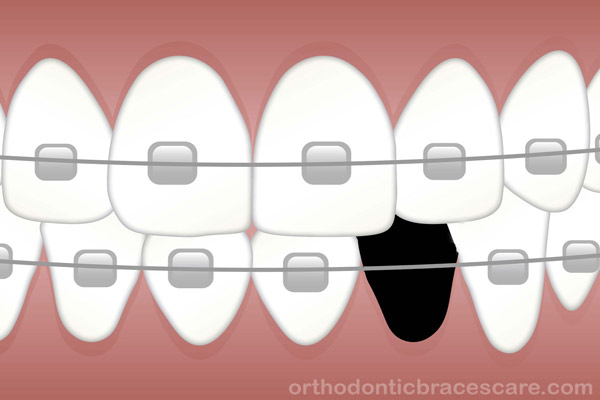
FYI: If you’re undergoing orthodontic treatment, baking soda can’t whiten the enamel under your brackets. You’ll need to wait until your braces come off.
Step-by-Step Methods to Use Baking Soda for Whitening
Alright, apron on (kidding—no actual cooking needed). Here are the dentist-approved ways to use baking soda for a brighter smile.
1. Simple Baking Soda Paste
What you need:
- 1 teaspoon of baking soda
- A few drops of water
Steps:
- Mix the baking soda with water until you get a smooth paste.
- Apply it to your toothbrush and brush your teeth gently for about 2 minutes.
- Rinse thoroughly.
How often: 2–3 times a week at most. Any more and you risk thinning your enamel.
2. Baking Soda + Hydrogen Peroxide
This combo is like the Batman and Robin of DIY whitening. Hydrogen peroxide has mild bleaching properties, and together they work wonders on coffee or tea stains.
What you need:
- 1 teaspoon baking soda
- 2–3 drops of 3% hydrogen peroxide
Steps:
- Mix into a paste.
- Brush gently for 1–2 minutes.
- Rinse thoroughly to remove all residue.
How often: No more than 1–2 times a week. Overdoing it can make teeth sensitive.
3. Baking Soda + Coconut Oil
Coconut oil won’t bleach your teeth, but it can help reduce plaque and bacteria. Plus, it leaves your mouth feeling fresh.
What you need:
- 1 teaspoon baking soda
- ½ teaspoon coconut oil
Steps:
- Mix the two into a creamy paste.
- Brush as usual for 2 minutes.
- Rinse well.
This one’s gentler and good for maintaining oral hygiene while mildly brightening.
4. Baking Soda + Lemon Juice (Use Rarely!)
This is the “don’t try this every day” hack. Lemon juice is acidic and can weaken enamel if overused.
What you need:
- 1 teaspoon baking soda
- 3–4 drops of fresh lemon juice
Steps:
- Mix into a foamy paste.
- Apply gently for no more than 1 minute.
- Rinse thoroughly.
Limit this method to once every couple of weeks, max.
Safety Tips and Precautions
- Moderation is key: Think of baking soda as a weekend treatment, not a daily habit.
- Use a soft brush: Hard bristles + abrasive paste = enamel damage.
- Watch for sensitivity: If your teeth feel sore or tingly, stop immediately.
- Keep your regular toothpaste: Baking soda doesn’t have fluoride, which you need to fight cavities.
- Consult a dentist if unsure: Especially if you have gum recession or dental restorations.
Myths vs. Facts About Baking Soda Whitening
- Myth: Baking soda scrapes enamel right off.
Fact: When used correctly, it’s less abrasive than most whitening pastes. - Myth: It whitens all types of stains.
Fact: It only helps with surface stains, not those deep inside the tooth. - Myth: Baking soda can replace toothpaste completely.
Fact: Nope. Use it alongside fluoride toothpaste to protect against cavities. - Myth: More is better.
Fact: Overuse can lead to sensitivity and enamel wear.
Alternatives and When to See a Dentist
Sometimes baking soda just won’t cut it—and that’s okay.
- Professional whitening treatments: Great for deep or intrinsic stains.
- Whitening toothpaste with baking soda: Gentle enough for everyday use.
- Dental cleanings: Sometimes you just need a good professional polish.
- Visit your dentist if: Stains don’t budge, or you notice pain, discoloration, or spots that look suspicious.
Pro Tips for Long-Lasting Whiter Teeth
- Limit staining foods/drinks: Or at least rinse after having them.
- Drink through a straw: Keeps coffee or iced tea from hitting your teeth directly.
- Brush after meals: Or rinse with water if brushing isn’t possible.
- Don’t skip flossing: Plaque buildup makes teeth look dull.
- See your dentist regularly: Professional cleaning keeps your smile brighter.
Conclusion
So, the low-down on whitening teeth naturally with baking soda. It’s affordable, simple, and effective for lifting mild surface stains—just remember that moderation is your best friend here.
If your goal is a celebrity-level white smile or if you have stubborn, deep-set stains, baking soda alone won’t get you there. That’s when you call your friendly neighborhood dentist (hey, that’s me!) for more advanced whitening options.
A brighter smile doesn’t always need a fancy gadget or expensive treatment—sometimes, it’s as simple as reaching for the little orange box in your pantry. Just be gentle, stay consistent, and flash those pearly whites with confidence. 🙂
Key Takeaways
- Baking soda is effective for mild surface stains.
- Use it 2–3 times a week max to avoid sensitivity.
- Pair it with fluoride toothpaste—don’t ditch your regular brushing routine.
- For deep stains, consider professional whitening.

Dr. Pallab Kishore, MS in Orthodontics and owner of Orthodontic Braces Care, shares expert tips on braces, aligners, and oral health from 10+ years of experience.