Stronger, shinier hair starts in the shower. The way you wash your strands can make or break their health and appearance. Small tweaks to your routine can deliver big results.
You don't need expensive products to see a difference. Often, it's the simple habits—like how you apply shampoo or rinse conditioner—that matter most. These 25 rules cover everything from prep to finish.
Each tip is backed by hair science and real-world experience. Whether you have fine, curly, or color-treated hair, these guidelines will help you achieve the vibrant, resilient hair you've been wanting.
1. Brush Before You Shower
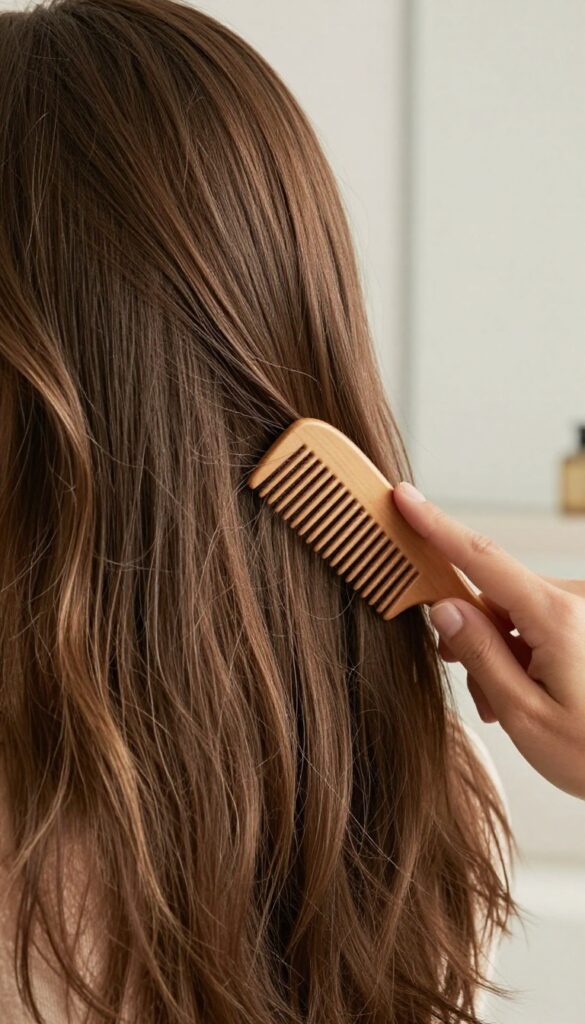
You might be tempted to skip brushing and jump straight into the water, but taking a minute to detangle dry hair first can save you from unnecessary breakage. Wet hair is more fragile and prone to snapping, so working out knots beforehand makes the whole wash gentler. Plus, brushing stimulates your scalp and helps distribute natural oils from roots to ends, giving your strands a pre-wash moisture boost.
Grab a wide-tooth comb or a gentle brush and work through your hair section by section, starting from the ends and moving upward. This technique minimizes pulling and damage. If you have curly or coily hair, finger-detangling or using a wide-tooth comb on dry hair works best to avoid frizz and breakage.
Choose The Right Tool
A boar bristle brush is great for smoothing and distributing oils, while a wide-tooth comb is ideal for detangling without snagging. Avoid fine-tooth combs or plastic brushes with ball-tipped bristles, as they can tug and break strands.
Work In Sections
Dividing your hair into manageable sections makes detangling more effective and less painful. Clip up the top layers and start with the bottom, gently releasing knots as you go. This method reduces stress on your hair and scalp.
Don't Overbrush
A few gentle passes are enough. Overbrushing can strip natural oils and cause friction damage. The goal is to remove tangles, not to polish the hair to a shine—that comes later in the shower.
2. Use Lukewarm Water
Hot water might feel relaxing, but it’s a fast track to dry, brittle hair. It strips away your scalp’s natural oils, leaving strands parched and prone to breakage. Lukewarm water is the sweet spot—it opens the hair cuticles just enough to let shampoo and conditioner do their job without causing damage.
Why Hot Water Hurts
Hot water dissolves sebum too aggressively, weakening the hair’s protective barrier. Over time, this leads to frizz, dullness, and increased shedding. If you love a steamy shower, at least keep your hair out of the direct stream.
How Lukewarm Helps
Lukewarm water (around 100°F) gently lifts the cuticle, allowing cleansers to remove buildup without stripping essential moisture. It also helps conditioner penetrate deeper, leaving hair softer and shinier.
The Cool Rinse Finish
After conditioning, switch to cool water for a final rinse. Cool water seals the cuticle, locking in moisture and boosting shine. It also reduces frizz and makes hair look smoother instantly.
3. Rinse with Cool Water at the End
That blast of cold water at the end of your shower might be uncomfortable, but your hair will thank you. A cool final rinse helps seal the hair cuticle, locking in moisture and smoothing the strands. This simple step can dramatically boost shine and reduce frizz, especially if you have porous or damaged hair.
You don't need to endure an ice-cold shower. Just a quick 10-15 second rinse with cool (not freezing) water after conditioning is enough to make a difference. Your hair will look glossier and feel smoother, with less flyaway frizz.
The science is simple: heat opens the cuticle, cold closes it. By finishing with cool water, you trap moisture inside and prevent humidity from puffing up the hair shaft. It also helps flatten the cuticle, which reflects light better for a natural shine.
Temperature Tips
Aim for lukewarm water during your wash and save the cool rinse for the very end. If you can't handle cold, simply switch to the coolest setting you can tolerate. The key is a temperature drop, not an arctic shock.
Best For Frizz-prone Hair
If your hair tends to get poofy or frizzy after washing, a cool rinse is a game-changer. It helps smooth the cuticle so moisture stays out on humid days, keeping your style sleek and defined.
Don't Skip On Color-treated Hair
Cool water helps seal the cuticle and lock in color molecules, reducing fading. It also adds a glossy finish that makes color look vibrant and fresh. A small temperature change can extend your salon results.
4. Shampoo Only the Scalp
It's tempting to work shampoo through every inch of your hair, but that's a mistake. Shampoo is designed to break down oil and buildup—something your scalp has plenty of, but your lengths and ends don't need. By focusing on your roots, you clean where it matters most while keeping the rest of your hair from getting stripped.
When you lather shampoo onto your ends, you're removing the natural oils that keep them soft and protected. Those oils are produced at the scalp and travel down the hair shaft, so the ends are already the driest part. Shampooing them directly just makes things worse, leading to frizz, split ends, and dullness.
Why The Scalp Needs The Attention
Your scalp produces sebum, an oily substance that can trap dirt, dead skin, and product residue. If you don't clean it thoroughly, buildup can clog follicles and even slow hair growth. By massaging shampoo into your scalp, you're giving it the deep clean it needs without drying out the rest of your hair.
How To Shampoo Correctly
Start by wetting your hair completely. Squeeze a quarter-sized amount of shampoo into your palms, then apply it directly to your scalp. Use your fingertips—not nails—to gently massage in circular motions.
Focus on the crown, temples, and nape of your neck. As you rinse, let the suds run down the length of your hair; that's enough to clean the ends.
What About Oily Hair?
Even if your hair gets greasy fast, resist the urge to scrub the lengths. Oily hair is usually a scalp issue, not an ends issue. Double-shampooing your scalp can help control excess oil without damaging the rest of your hair.
Just make sure to follow with conditioner on the mid-lengths and ends to keep them hydrated.
5. Dilute Your Shampoo

Straight-from-the-bottle shampoo can be too concentrated, especially if you have fine or delicate hair. A little dilution goes a long way toward preventing product buildup and making sure the shampoo spreads evenly. This simple step can also save you money by making each bottle last longer.
Mixing shampoo with water before applying it to your hair reduces its strength, which helps avoid stripping natural oils. It also makes the shampoo easier to distribute from roots to ends, ensuring every strand gets cleaned without overloading any one area. For best results, use a 1: 1 ratio in a small bottle or your palm just before washing.
Why Dilution Works
Most shampoos are formulated to be effective even when diluted. Adding water lowers the concentration of surfactants, which can be harsh on your scalp and hair if applied directly. This gentler approach reduces irritation and helps maintain your hair's moisture balance.
How To Dilute Properly
Fill a small squeeze bottle with equal parts shampoo and water, then shake gently. Alternatively, mix a dollop of shampoo with a splash of water in your palm just before applying. Avoid diluting too far in advance, as some formulas can separate or lose effectiveness over time.
Who Benefits Most
Diluting shampoo is especially helpful for people with fine, thin, or color-treated hair. It also works well for those who wash frequently or have sensitive scalps. If you use a clarifying or medicated shampoo, check the label first—some are meant to be used full strength.
6. Double Shampoo When Needed
Ever feel like your hair still looks greasy after washing? That's a sign you might need a second round of shampoo. A single lather often isn't enough to break down heavy oils, silicones, or product buildup.
Double shampooing gives your scalp a fresh start without stripping it dry.
Double shampooing isn't for every wash. Reserve it for days when your hair feels weighed down or you've used lots of styling products. Start with a small amount of shampoo, focus on the roots, and rinse.
Then apply a second, slightly smaller amount. The first wash removes surface dirt; the second really cleanses. You'll notice your scalp feels lighter and your hair looks shinier.
When To Double Shampoo
If you use dry shampoo, gels, or heavy oils, a double shampoo can prevent buildup. Also try it after a sweaty workout or if you have naturally oily hair. But if your hair is dry or color-treated, limit double shampooing to once a week.
How To Double Shampoo Correctly
Use a gentle, sulfate-free shampoo for the first round to avoid over-stripping. The second round can be your regular shampoo. Focus on the scalp, not the ends.
Let the second lather sit for a minute before rinsing.
Signs You Overdid It
If your hair feels squeaky or looks frizzy after double shampooing, you're cleansing too often. Scale back. Your hair should feel clean but still soft.
A good test: run your fingers through wet hair—if it glides easily, you're good.
7. Condition from Mid-Length to Ends
Conditioner is a game-changer for softness and shine, but where you apply it matters just as much as what you use. Slathering it all over your scalp is a common mistake that leads to limp, greasy roots. The driest parts of your hair—the mid-lengths and ends—need the most moisture, while your scalp produces its own natural oils.
Focus conditioner on the areas that need it most. Start a few inches below your roots and work down to the tips. This keeps your scalp clean and your lengths hydrated without weighing anything down.
Why The Scalp Doesn’t Need It
Your scalp already produces sebum, which travels down the hair shaft. Adding extra conditioner there just creates buildup, making hair look flat and dirty faster. Save the heavy moisture for where it's actually lacking.
How To Apply Correctly
After shampooing, squeeze out excess water. Take a quarter-sized amount of conditioner and run it through your hair from the ears down. Use a wide-tooth comb to distribute evenly, then let it sit for a minute or two before rinsing.
Adjusting For Hair Type
Fine hair needs a lightweight conditioner and even less product—just a dime-sized amount. Thick or curly hair can handle richer formulas and more generous application, but still avoid the scalp. Experiment to find your sweet spot.
8. Let Conditioner Sit for 3–5 Minutes
Most of us slap on conditioner and rinse it out within seconds. That's not enough time for the ingredients to actually work. Giving your conditioner a few minutes to sink in can transform your hair's softness and shine.
Conditioner needs time to penetrate the hair cuticle and deliver moisture. Rinsing too quickly means you're washing away the benefits before they can take effect. A short wait makes a big difference.
Why Time Matters
Conditioners contain ingredients like oils, proteins, and humectants that need time to bind to the hair shaft. The cuticle, which is like tiny shingles, opens slightly when wet, allowing these ingredients to slip inside. If you rinse too fast, they just slide off.
How To Make The Most Of The Wait
Apply conditioner after shampooing, then clip your hair up or step out of the water. Use those 3–5 minutes to wash your body, shave, or exfoliate. The steam and warmth help the conditioner absorb even better.
Signs You're Rinsing Too Soon
If your hair still feels dry or tangly after conditioning, you might not be leaving it on long enough. Another clue: if you need a ton of leave-in products to get softness, try extending your conditioner dwell time first.
9. Use a Wide-Tooth Comb in the Shower
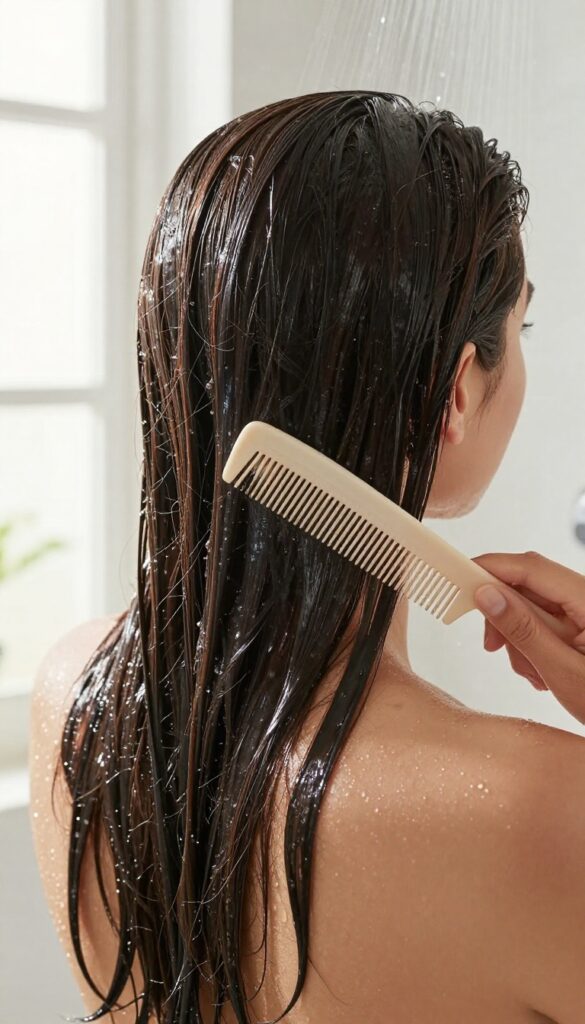
Detangling wet hair is a delicate operation. When hair is saturated with water and conditioner, it's more elastic but also more prone to snapping. That's where a wide-tooth comb becomes your best friend.
Using a wide-tooth comb in the shower, while your conditioner is still in, helps gently separate knots without yanking or breaking strands. The wide spacing glides through hair, reducing friction and preventing split ends.
This simple switch from a brush to a wide-tooth comb can transform your hair's health. Brushing wet hair with a regular brush can cause stretching and breakage, especially for curly or fine hair. A wide-tooth comb works with the conditioner's slip to detangle smoothly.
Start at the ends and work your way up to avoid tugging on tangles. This technique also helps distribute conditioner evenly, ensuring every strand gets the nourishment it needs.
Why A Wide-tooth Comb Works Best
Wide-tooth combs have larger gaps between teeth, which means less pulling and snagging. They separate hair gently, making them ideal for detangling when hair is most vulnerable. Unlike brushes, they don't create tension that can lead to breakage.
How To Detangle In The Shower
Apply conditioner and let it sit for a minute. Then, with a wide-tooth comb, start at the very ends and slowly work upward. Rinse thoroughly afterward.
This method minimizes damage and leaves hair smoother.
Best For All Hair Types
Whether you have fine, thick, curly, or straight hair, a wide-tooth comb is gentle enough for daily use. It's especially helpful for curly hair, which is prone to tangling and breakage when dry.
10. Rinse Thoroughly
Leftover product can cause buildup, dullness, and even scalp irritation. That squeaky-clean feeling isn't just satisfying—it's a sign you've removed all residue. Rinsing properly is a simple step that makes a big difference in how your hair looks and feels.
Many people rush the rinse step, leaving behind shampoo or conditioner that weighs hair down. Over time, this buildup can make strands look lifeless and even lead to an itchy scalp. A thorough rinse ensures your hair is truly clean and ready to absorb moisture from your next products.
Check The Water Temperature
Warm water opens the cuticle, helping to remove dirt and oil. But for the final rinse, switch to cool water. Cold water seals the cuticle, locking in moisture and boosting shine.
It also helps reduce frizz by flattening the hair's outer layer.
Don't Forget The Scalp
Product residue often hides along the scalp, leading to clogged follicles and flakes. Spend an extra 30 seconds massaging your scalp under the water stream. This ensures all shampoo and conditioner are gone, promoting a healthy environment for hair growth.
Rinse Until Water Runs Clear
A good rule of thumb: keep rinsing until the water runs completely clear, with no suds or milky residue. This is especially important for thick or curly hair, where product can hide deep in the strands. Patience here pays off with cleaner, bouncier hair.
11. Squeeze Out Excess Water Gently
That rough towel rub you do after every shower? It's causing more damage than you think. Wet hair is at its weakest and most elastic, so rough handling can lead to breakage, frizz, and dullness.
The fix is simple: swap rubbing for squeezing.
After rinsing out your conditioner, gently squeeze your hair from roots to ends to remove excess water. Then grab a soft microfiber towel or an old cotton T-shirt and wrap it around your hair, pressing lightly to absorb moisture. Avoid twisting or wringing—that creates tangles and weakens the hair shaft.
Let your hair air-dry for a few minutes before applying any products or heat.
Why Rubbing Is A No-go
When you rub wet hair with a towel, the friction lifts the cuticle layer, causing frizz and rough texture. Over time, this weakens the hair and leads to split ends. Squeezing keeps the cuticle flat and smooth, preserving shine.
The Right Towel Matters
Regular bath towels have rough loops that snag hair. Microfiber towels or cotton T-shirts are much gentler. They absorb water quickly without creating friction, so your hair dries faster and stays smoother.
How To Squeeze Properly
Start at the roots and work your way down, using a gentle pressing motion. Don't scrunch or bunch the hair—just apply even pressure. For long hair, section it into two or three parts to ensure even moisture removal.
12. Use a Microfiber Towel or Cotton T-Shirt
The way you dry your hair matters more than you think. Regular bath towels have rough loops that snag and lift the hair cuticle, leading to frizz and breakage. Switching to a microfiber towel or a soft cotton T-shirt is an easy swap with immediate benefits.
Microfiber towels are designed to be super absorbent without the roughness. They wick away moisture quickly, reducing drying time and minimizing friction. Cotton T-shirts work similarly—their smooth weave glides over strands without causing damage.
Both options help preserve your hair's natural shine and strength.
Why Regular Towels Are Trouble
Terry cloth towels have loops that catch on wet hair, especially when you rub. This friction lifts the cuticle, making hair look dull and feel rough. Over time, it can lead to split ends and breakage.
How To Use Microfiber Or T-shirt
After washing, gently squeeze out excess water. Then wrap your hair in a microfiber towel or a clean, soft T-shirt. Let it sit for 10–15 minutes to absorb moisture—no rubbing or twisting.
Then air-dry or style as usual.
Extra Tips For Best Results
Use a dedicated microfiber towel for hair only to avoid lint transfer. Wash it separately with mild detergent. For T-shirts, choose 100% cotton with a tight weave.
Replace them when they start to pill.
13. Apply Leave-In Conditioner on Damp Hair
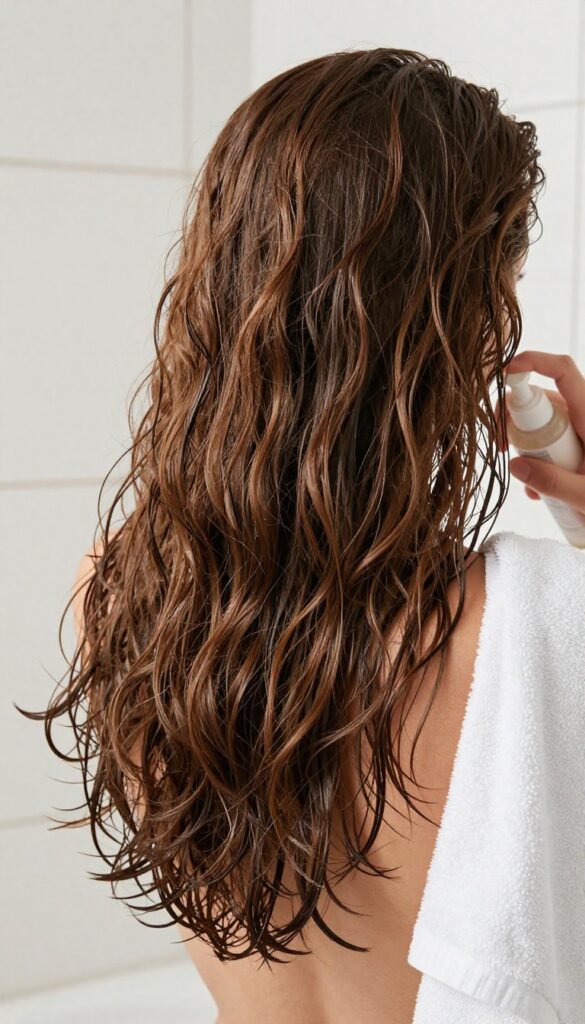
You might be tempted to slather on leave-in conditioner right after turning off the shower, but timing matters. Applying it to soaking wet hair actually dilutes the product and reduces its effectiveness. Instead, wait until your hair is damp—about 70-80% dry—for the best absorption.
When hair is damp, the cuticles are still slightly open, allowing the conditioner to penetrate deeply. Wet hair, on the other hand, is coated in excess water that blocks the product from reaching the hair shaft. By waiting a few minutes, you ensure every drop of leave-in works its magic, locking in moisture and smoothing frizz without weighing hair down.
Why Damp Hair Wins
Damp hair has the perfect balance of moisture and openness. The cuticles are lifted just enough to let ingredients like oils and proteins sink in, but not so open that the product slides off. This means better hydration, less frizz, and a softer finish.
How To Get The Timing Right
After your shower, gently squeeze out excess water with a microfiber towel or an old cotton T-shirt. Let your hair air-dry for 5–10 minutes, or until it feels cool and slightly damp to the touch. Then apply your leave-in conditioner from mid-lengths to ends, avoiding the roots to prevent greasiness.
14. Don't Skip a Weekly Deep Conditioner
A weekly deep conditioner is like a spa day for your hair. It delivers a concentrated dose of moisture and nutrients that regular conditioners just can't match. Over time, this simple habit can transform dry, brittle strands into soft, resilient locks.
Think of your weekly deep conditioner as a reset button for your hair. It replenishes lost moisture, repairs damage from heat styling and environmental stressors, and strengthens the hair shaft from within. Consistency is key—make it a non-negotiable part of your Sunday routine.
Why Weekly Matters
Daily life takes a toll on your hair. UV rays, pollution, and heat tools strip away natural oils and proteins. A weekly deep conditioner fills those gaps, preventing long-term damage and keeping your hair looking its best.
How To Apply It Right
Start with clean, damp hair. Apply the mask from mid-lengths to ends, avoiding the scalp to prevent greasiness. Leave it on for the recommended time—usually 10 to 20 minutes—then rinse thoroughly with cool water to seal the cuticle.
Pick The Right Formula
Match your mask to your hair type. Fine hair benefits from lightweight, protein-rich formulas, while thick or curly hair thrives with creamy, moisturizing masks. Look for ingredients like shea butter, argan oil, or keratin for targeted repair.
15. Clarify Once a Month
Even the best shampoos can leave behind traces of product, hard water minerals, and oils that build up over time. That buildup coats your strands, making them look dull and feel heavy. A monthly clarifying wash strips all that away, restoring your hair's natural shine and bounce.
Think of clarifying as a reset button for your hair. It removes the invisible layer that prevents moisture and treatments from penetrating. Just one wash can make a noticeable difference in how your hair looks and feels.
Know When It's Time
If your hair feels limp, looks flat, or products don't seem to work like they used to, that's a sign of buildup. Also, if you use a lot of styling products, dry shampoo, or live in a hard water area, monthly clarifying becomes even more important.
Choose The Right Clarifier
Not all clarifying shampoos are created equal. Look for one with chelating agents like EDTA or citric acid to tackle mineral buildup. Avoid formulas with heavy sulfates if your hair is color-treated or very dry—opt for a gentle clarifying shampoo instead.
Follow Up With Moisture
Clarifying can be stripping, so always follow with a hydrating conditioner or a deep conditioning mask. This restores moisture and keeps your hair soft and manageable. Your strands will thank you with extra shine.
16. Adjust Wash Frequency to Your Hair Type
Not everyone needs to wash their hair every day. In fact, washing too often or too little can cause problems. The key is matching your routine to your scalp and hair type.
Oily scalps may need daily washing, while dry or curly hair can go longer between washes.
Finding your ideal wash schedule takes a little trial and error. Start by observing how your scalp feels and how your hair looks on day two or three. Adjust gradually until you find the sweet spot where your hair looks fresh and feels healthy.
Oily Scalp: Daily Or Every Other Day
If your scalp produces excess oil, washing daily or every other day with a gentle shampoo can keep grease at bay. Look for clarifying or balancing formulas. Avoid harsh sulfates that strip too much oil, which can trigger even more production.
Dry Or Curly Hair: Every 3 To 7 Days
Dry scalps and curly textures benefit from less frequent washing. Shampooing once or twice a week preserves natural oils that keep strands hydrated. Co-washing (using conditioner only) between shampoo days can refresh without stripping.
Normal Hair: Every 2 To 3 Days
If your scalp is neither oily nor dry, washing every two to three days usually works well. Use a mild shampoo and focus on the scalp, letting the suds rinse through the lengths. This keeps your hair clean without over-drying.
17. Avoid Sulfates If You Have Color or Curls
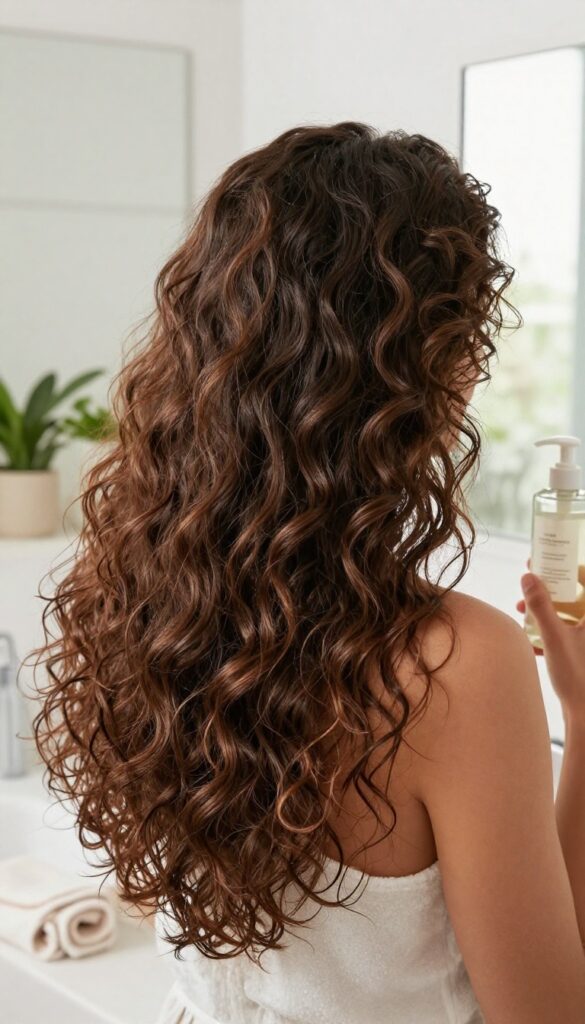
If you've ever watched your vibrant salon color fade faster than expected, sulfates might be the culprit. These harsh detergents create that satisfying lather but strip away color molecules and natural oils. Curly hair is especially vulnerable because it's naturally drier and more porous.
Switching to sulfate-free shampoos is one of the simplest swaps you can make for longer-lasting color and bouncier curls.
Sulfates like sodium lauryl sulfate (SLS) and sodium laureth sulfate (SLES) are effective cleansers, but they're too aggressive for delicate hair. They break down the cuticle, causing color to bleed and curls to frizz. Sulfate-free formulas use milder surfactants that clean without stripping.
Your hair retains moisture, color stays vibrant, and curls hold their shape. Look for labels that say 'sulfate-free' or check ingredients for words like coco-glucoside or sodium cocoyl isethionate.
Why Sulfates Are Bad For Color
Color-treated hair has an already compromised cuticle from the coloring process. Sulfates act like a scrub brush, prying open the cuticle and flushing out dye molecules. This accelerates fading, often within just a few washes.
Sulfate-free shampoos are pH-balanced and gentle, helping color last up to 40% longer.
Why Curls Need Sulfate-free Care
Curly hair is naturally drier because oils from the scalp have a harder time traveling down spiral strands. Sulfates strip those precious oils, leaving curls frizzy, brittle, and prone to breakage. A sulfate-free shampoo cleanses the scalp without robbing curls of moisture, so they stay defined and soft.
How To Transition To Sulfate-free
Expect an adjustment period. Your hair may feel different at first—less squeaky clean—because it's not being stripped. That's a good sign.
You might also notice less lather, but that doesn't mean it's not working. Give it two to three weeks for your scalp to regulate oil production. Your hair will thank you with more shine and resilience.
18. Use a Scalp Scrub or Brush
Your scalp is the foundation for healthy hair, yet it's often neglected. Dead skin cells, excess oil, and product residue can clog follicles and slow growth. A simple scrub or brush can clear the way for stronger strands.
Gentle exfoliation removes buildup and stimulates blood flow, delivering oxygen and nutrients to hair roots. This creates an optimal environment for growth and boosts shine from the root up.
Why Exfoliation Matters
Think of your scalp like garden soil. If it's crusty or compacted, nothing grows well. Exfoliating sloughs off dead skin and unclogs follicles, reducing flakiness and itchiness.
It also helps your shampoo work better by letting it reach the scalp directly.
Scrub Vs. Brush: Which To Choose
A physical scrub (like a sugar or salt blend) works well for normal to oily scalps. Use it once a week, massaging gently in circles. A silicone or bristle brush is better for sensitive scalps or daily use.
It lifts buildup without harsh ingredients and can be used with your regular shampoo.
How To Use Without Overdoing It
Start with once a week and increase if your scalp feels good. Wet your hair, apply the scrub or brush, and focus on the crown and hairline. Rinse thoroughly.
If you have a dry or irritated scalp, skip scrubs with large granules and stick to a soft brush.
19. Don't Wash Hair Every Day
Many of us have been conditioned to believe that daily washing equals clean hair. But for most hair types, that's not the case. Your scalp produces natural oils that protect and moisturize your strands, and washing too often strips those away.
The result? Dry, brittle hair that's more prone to breakage.
Over-washing strips protective oils, leading to dryness and breakage. Let your hair's natural moisture work for you.
How Often Should You Wash?
It depends on your hair type and lifestyle. Oily scalps may need washing every other day, while dry or curly hair can go 3–7 days between washes. Experiment to find your sweet spot.
Signs You're Washing Too Much
If your hair feels straw-like, looks dull, or breaks easily, you might be overwashing. Also, a flaky scalp can be a sign of stripped moisture, not dirt.
Transitioning To Fewer Washes
Your scalp will adjust over time. Start by skipping one wash day per week, then gradually increase. Dry shampoo can help absorb excess oil during the transition.
20. Protect Hair Before Swimming
Chlorine and salt water can strip your hair of natural oils, leaving it dry and brittle. But a simple pre-swim routine can create a barrier that locks moisture in and keeps damage out. It takes just a minute and makes a huge difference.
Why Pre-wet Hair?
When your hair is already saturated with clean water, it absorbs less of the chlorinated or salty water. Think of it like a sponge—if it's already full, it can't soak up much more. This simple step reduces chemical exposure significantly.
The Oil Or Leave-in Shield
After wetting your hair, apply a light layer of coconut oil, argan oil, or a leave-in conditioner. These products coat each strand, repelling chlorine and salt while sealing in moisture. Focus on the ends, which are most vulnerable.
Rinse Immediately After
As soon as you're out of the pool or ocean, rinse your hair with fresh water. Follow with a gentle shampoo and a deep conditioner to remove any residual chemicals and restore hydration. Don't let the chlorine sit on your hair.
21. Use a Shower Filter
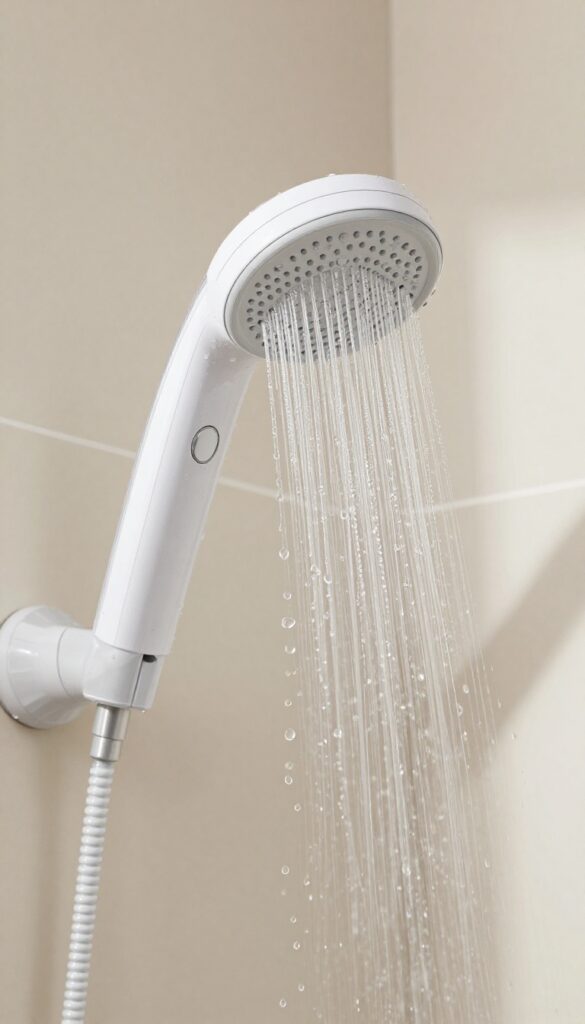
Hard water is a silent enemy of shiny hair. Those minerals—calcium, magnesium, iron—build up on your strands over time, leaving them dull, brittle, and prone to tangles. A shower filter strips out these culprits before they ever touch your hair.
It's a simple upgrade that pays off fast. Your shampoo will lather better, your conditioner will rinse cleaner, and you'll notice a real difference in softness and shine within a few washes. No more battling mineral residue that makes hair look lifeless.
Hard water minerals cling to hair cuticles, creating a film that blocks moisture and light reflection. This leads to dullness, brassiness (especially on blonde or color-treated hair), and even breakage over time. A shower filter removes or reduces these minerals, letting your natural shine come through.
Filters are easy to install—most screw right onto your shower arm. Look for ones with KDF-55 or vitamin C media, which are effective against chlorine and heavy metals. Replace the cartridge every 3-6 months for consistent results.
What Hard Water Does To Hair
Hard water leaves behind a chalky residue that coats each strand. This buildup makes hair feel rough, look flat, and resist styling. Over time, it can even cause color to fade faster and create a dull, brassy tone on lightened hair.
Which Filter To Choose
Not all filters are equal. For hair, choose a filter that targets both chlorine and heavy metals. Vitamin C filters are great for neutralizing chlorine, while KDF-55 filters handle copper, lead, and iron.
A dual-stage filter gives the best all-around protection.
Installation And Maintenance
Most shower filters install in minutes with no tools—just unscrew your showerhead, screw on the filter, then attach the showerhead. Replace the cartridge every 3-6 months or when water flow slows. It's a low-effort habit with high-impact results for your hair.
22. Keep Products Off Your Scalp
That rich conditioner or leave-in treatment might feel luxurious, but piling it on your scalp can backfire. Heavy products can clog hair follicles, leading to irritation, flakiness, or even thinning over time. Your scalp needs to breathe, just like the rest of your skin.
The golden rule is to apply conditioners, masks, and serums only from the mid-lengths to ends of your hair. This keeps your scalp clean and your strands nourished where they need it most.
Why Scalp Clogging Happens
Many hair products contain oils, silicones, and waxes that build up on the scalp. This buildup can trap dead skin cells and bacteria, leading to inflammation and slowed hair growth. Your scalp's natural oil production can also go haywire, making it greasy or dry.
How To Apply The Right Way
After rinsing shampoo, squeeze excess water from your hair. Then, with your head tilted forward, apply conditioner starting a few inches from your roots. Use a wide-tooth comb to distribute it evenly, avoiding the scalp area entirely.
When To Make An Exception
Scalp treatments and medicated shampoos are designed for direct scalp application. But for everyday conditioners, masks, and styling products, keep them off your scalp. If you have a dry scalp, use a dedicated scalp serum instead of your regular conditioner.
23. Alternate Shampoos
Sticking to one shampoo year-round might feel safe, but your hair’s needs change with the seasons, styling habits, and product buildup. Rotating between a gentle daily shampoo and a clarifying one keeps your scalp and strands in balance without over-stripping or allowing residue to pile up.
Your hair doesn’t need the same cleanse every wash. A gentle daily shampoo removes light dirt and oil while preserving moisture, making it perfect for most washes. But every week or two, a clarifying shampoo deep-cleans to eliminate excess oil, product buildup, and hard water minerals.
This alternating rhythm prevents your hair from becoming either greasy or dried out.
When To Reach For Gentle
Use your gentle shampoo for 3 out of 4 washes. It’s ideal for normal days with minimal styling products or when your hair feels clean but not weighed down. Look for sulfate-free formulas labeled “daily” or “moisturizing. ”
When Clarifying Is Key
Reach for clarifying shampoo when your hair feels limp, looks dull, or has visible buildup from dry shampoo, gels, or hard water. A good rule: clarify every 1–2 weeks, or after heavy product use. Follow with a hydrating conditioner to restore moisture.
24. Pat Hair Dry, Don't Rub
What you do after you step out of the shower is just as important as the washing itself. If you're in the habit of roughly rubbing your hair with a towel, it's time to switch things up. That aggressive motion can do more harm than good, leading to frizz and breakage that no conditioner can fix.
When hair is wet, it's at its most fragile state. The outer layer, called the cuticle, lifts up when saturated, making it vulnerable to damage. Rubbing with a towel creates friction that lifts the cuticle even more, causing frizz, tangles, and even split ends.
Patting, on the other hand, gently absorbs moisture without disturbing the hair's surface. This simple swap can make a noticeable difference in how smooth and shiny your hair looks once it's dry.
Why Rubbing Hurts
Rubbing wet hair is like scrubbing a delicate fabric—it weakens the fibers over time. The friction from a towel can roughen the cuticle, leading to a dull, frizzy appearance. If you have curly or textured hair, rubbing can also disrupt your natural curl pattern, causing unwanted puffiness.
How To Pat Correctly
After washing, gently squeeze excess water from your hair with your hands. Then, take a soft microfiber towel or an old cotton T-shirt and press it against sections of your hair, absorbing moisture without moving the towel back and forth. Repeat until your hair is just damp, then proceed with your styling routine.
Best Towels For The Job
Microfiber towels are ideal because they're super absorbent and gentle on hair. If you don't have one, a soft cotton T-shirt works just as well. Avoid thick, rough terry cloth towels—they're too harsh for wet strands.
25. Finish with a Serum or Oil
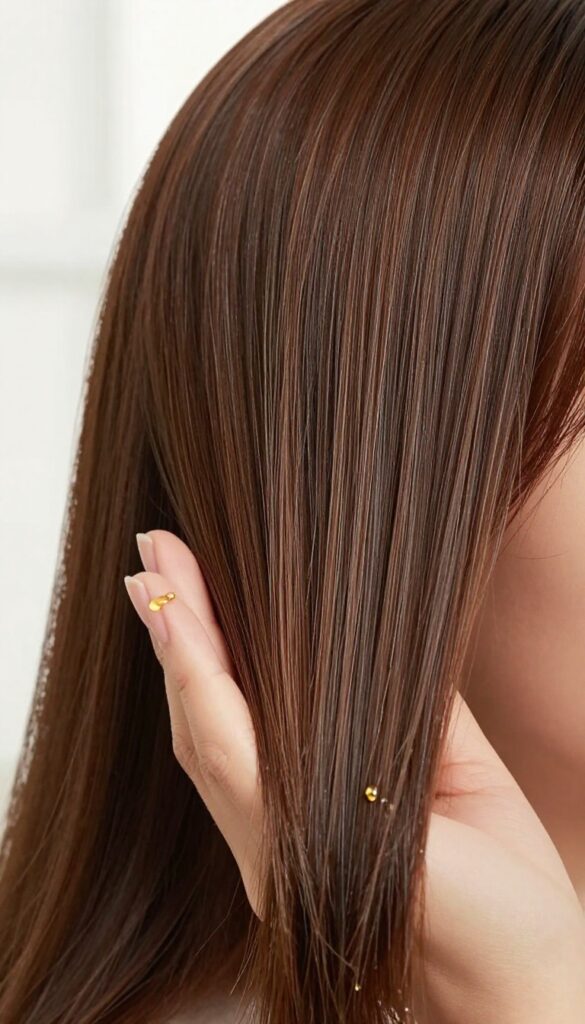
That final step after styling can make all the difference. A lightweight oil or serum on damp ends locks in hydration and gives your hair that glossy finish you see in ads. It's a simple addition that instantly elevates your look and protects your strands throughout the day.
Why Damp Ends Are The Sweet Spot
Applying oil to soaking wet hair dilutes the product, while dry hair absorbs it unevenly. Damp ends are like a sponge—they soak up just the right amount of moisture without feeling greasy. This timing seals the cuticle and prevents frizz as your hair dries.
Choosing The Right Oil For Your Hair Type
Fine hair loves argan or jojoba oil—they're light and won't weigh strands down. Thick or curly hair can handle heavier oils like coconut or castor. If you have color-treated hair, look for a serum with UV filters to protect against fading.
How Much Is Too Much?
Start with a pea-sized drop and rub it between your palms. Run your hands over your ends, then add more only if needed. Too much oil can make hair look stringy or dirty by midday.
Less is more—you can always add, but you can't take away.
FAQ
How often should I wash my hair?
It depends on your hair type and lifestyle. Oily hair may need daily washing, while dry or curly hair can go 2–4 days between washes. Listen to your scalp and adjust.
Is cold water rinse really necessary?
A cool rinse helps seal the cuticle, reducing frizz and boosting shine. It's not mandatory, but it's an easy way to enhance results without extra products.
Can I use conditioner on my scalp?
It's best to avoid conditioner on the scalp unless you have a very dry scalp. Conditioner can weigh down roots and cause greasiness. Focus on mid-lengths and ends.
What's the best towel for drying hair?
Microfiber towels or soft cotton T-shirts are gentlest on hair. They reduce friction and absorb excess water without causing frizz or breakage.
Do I really need a clarifying shampoo?
If you use styling products, hard water, or have buildup, a monthly clarifying shampoo removes residue and restores shine. It's not for daily use, but it's a great reset.
Conclusion
You don't need to master all 25 rules at once. Start with a few that address your hair's biggest needs—maybe switching to lukewarm water or skipping that daily wash.
Small, consistent changes build a routine that delivers stronger, shinier strands over time. Pick what fits your hair type and build from there.