Getting braces is a bit like signing up for a new gym membership—you know it’s good for you, but you still dread that first sore week. I’ve seen this mix of excitement and mild panic on the faces of hundreds of patients (and honestly, I felt the same way when I got mine years ago).
If you’re here, you’re probably wondering: “What will it feel like? Will I ever eat popcorn again? And why do people keep mentioning wax—are we talking candles or braces?”
Relax. I’m here to walk you through the real, unfiltered stuff you should know before your smile makeover begins.
Think of me as your dentist-friend—minus the lecture tone and with a sprinkle of sarcasm when needed.
By the end of this guide, you’ll feel prepared, less stressed, and maybe even excited to start the journey.
Understanding the Basics
1. Why Braces Are More Common Than You Think
Here’s the thing: braces aren’t just for awkward teenagers in high school yearbooks. Adults now make up nearly one-third of orthodontic patients, and for good reason—healthy, aligned teeth aren’t about age; they’re about confidence and long-term oral health. If you’ve been avoiding braces because you think you’re “too old,” trust me, that excuse has officially expired.
2. Types of Braces You Can Choose From
One of the first big decisions you’ll face is picking the type of braces. Each comes with pros, cons, and a certain “vibe”:
- Metal braces: The classic workhorses—durable, affordable, and now sleeker than the chunky ones you remember from the ’90s.
- Ceramic braces: Tooth-colored and less noticeable, but slightly pricier and more fragile.
- Self-ligating braces: Quicker adjustment appointments, fewer elastics—IMO, a great middle-ground choice.
- Lingual braces: Tucked behind your teeth and practically invisible, but they can be harder to clean and adjust.
- Clear aligners: Technically not braces, but worth mentioning—popular for mild to moderate cases and super discreet.
Your orthodontist will guide you based on your bite, lifestyle, and budget, but it helps to walk in knowing your options.
3. How Long You’ll Likely Wear Them
Most people need braces for 18–24 months, but don’t carve that into your calendar just yet. Treatment time depends on how complex your bite is, how disciplined you are with appointments, and (this one surprises many) how well you care for your braces.
Break brackets often or skip checkups, and congratulations—you’ve just extended your sentence.
Pre-Treatment Prep You Shouldn’t Skip
4. Start with a Full Dental Checkup
Here’s an insider tip: braces work best on a healthy mouth. If you’ve got untreated cavities, gum inflammation, or tartar buildup, fix those first.
Nothing delays your orthodontic start date like an emergency filling or gum infection right after you’ve got shiny new brackets glued on.
5. The Consultation: What to Expect and What to Ask
Think of your consultation as the “job interview” for your future smile. Come armed with questions like:
- How often will I need adjustments?
- Are there extractions involved?
- What’s the estimated treatment timeline?
- Will my insurance cover part of the cost?
Trust me, asking now saves you from panicking later when you realize you signed up for elastics and power chains without knowing it.
6. Budgeting and Insurance 101
Braces aren’t cheap, but they’re an investment. Traditional metal braces often run between $3,000 and $6,000 depending on where you live and the complexity of your case. Check if your insurance covers part of the cost, and ask about payment plans. Many offices now offer zero-interest monthly installments—worth asking about before you max out a credit card.
7. Lifestyle Adjustments to Expect
If you play sports, get used to mouthguards; if you’re in the school band, your first few trumpet sessions may feel like you’re auditioning for a horror film soundtrack. 😉 You’ll also need to rethink habits like chewing ice or nail-biting—your braces won’t appreciate the extra stress.
Comfort, Pain & Adjustments
8. The First Week Reality Check
Let’s keep it real: your first week with braces won’t feel like a spa retreat. Your teeth will feel tender and achy, your cheeks might protest with some sore spots, and you’ll probably find yourself Googling “softest foods known to humankind.” This is all normal. Stick to soups, yogurt, and mashed potatoes, and remember—this phase passes quickly.
9. Dealing with Tightening Appointments
Every 4–6 weeks, you’ll visit your orthodontist to tighten the wires or switch elastics. These adjustments usually bring mild soreness that peaks about 24 hours after the visit. I tell my patients to take an over-the-counter pain reliever beforehand and keep something soft (like mac and cheese) ready for dinner that night.
10. Must-Have Tools for Comfort
A few inexpensive items can save you a lot of discomfort:
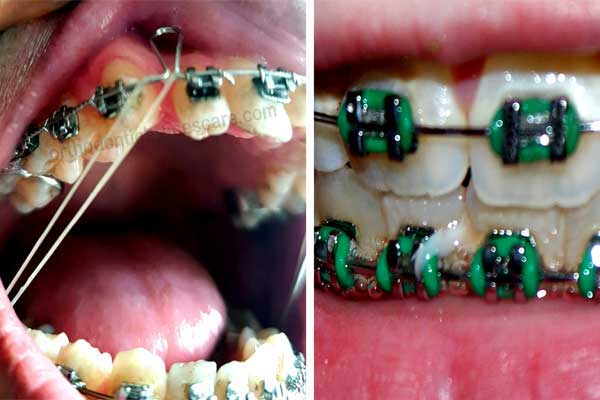
- Orthodontic wax: Your new best friend for covering sharp brackets and wires.
- Saline rinses: Warm saltwater can soothe irritated gums and cheeks.
- Mouth sore gels: A dab on sore spots feels like a mini rescue mission.
- Travel-size toothbrush: Essential for quick clean-ups after meals.
Pack these in a small pouch for school, work, or travel—you’ll thank me later.
11. Emergency Fixes at Home
Sometimes braces act up when your ortho’s office is closed—because why wouldn’t they? Loose brackets, poking wires, or broken elastics aren’t full-blown emergencies but can be annoying.
- Loose bracket? Leave it in place if it’s still attached to the wire and call your ortho to schedule a fix.
- Poking wire? Use a cotton swab or clean tweezers to gently push it back into place, or cover the sharp end with orthodontic wax.
- Severe pain or bleeding? That’s your cue to call your orthodontist ASAP instead of toughing it out.
Most minor hiccups can wait a day or two, but don’t ignore anything that feels like it’s stabbing you or causing swelling.
Oral Hygiene Game-Changers
12. Brushing the Right Way with Braces
Braces come with extra hiding spots for food—think of them as little snack traps. To keep your teeth healthy, brush after every meal (yes, even that tiny afternoon snack). Use a soft-bristle brush angled at 45° to clean above and below the brackets. Electric toothbrushes with orthodontic brush heads are worth the investment—they make life so much easier.
13. Flossing Without Losing Your Mind
Flossing with braces is where patience gets tested. Those wires don’t exactly roll out the red carpet for your floss. Luckily, floss threaders and water flossers can save your sanity. FYI: water flossers don’t fully replace floss, but they help clear out stubborn bits around brackets. A minute or two each night keeps plaque and cavities from sneaking in.
14. Mouthwash & Other Helpers You’ll Love
A good fluoride mouthwash strengthens enamel and lowers your risk of white spots (those chalky marks that sometimes show up when braces come off). Antimicrobial rinses can also keep your gums healthy. Bonus tip—keep a pocket-size rinse bottle in your backpack or car for quick refreshes after meals.
Food Rules (Yes, There Are Many!)
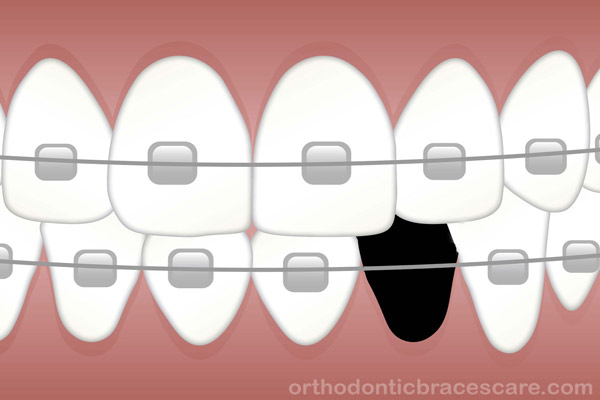
15. Foods to Avoid Like the Plague
Let’s rip off the band-aid: certain foods and braces just don’t get along. Skip anything that’s sticky, chewy, or super crunchy:
- Caramel and chewy candies
- Hard nuts and popcorn kernels
- Ice cubes (please don’t chew them!)
- Crunchy taco shells or crusty bread
You’ll thank yourself later when you’re not making an emergency visit for a snapped wire.
16. Soft and Braces-Friendly Food Ideas
The first few weeks will have your teeth feeling tender, so soft foods are your best buddies:
- Creamy soups and broths
- Mashed potatoes and scrambled eggs
- Yogurt, smoothies, and oatmeal
- Ripe bananas, avocados, and soft-cooked veggies
The good news? You’ll discover some cozy comfort meals you’ll want to keep even after treatment.
17. Snacking Smart Without Breaking a Bracket
You don’t have to live off mashed potatoes forever. Pack braces-friendly snacks like cheese cubes, hummus with soft pita bread, or sliced fruit (just avoid hard apple chunks—go thin or go home). These choices save you from mid-day hanger and accidental wire drama.
Lifestyle & Social Tips
18. Smiling with Confidence (Even with Braces!)
Here’s a secret—most people barely notice your braces after the first few weeks. Smile like you mean it! If you’re feeling shy, try practicing your grin in the mirror until it feels natural. A confident smile outshines the brackets every single time.
19. Playing Sports or Instruments Safely
Sports lovers, meet your new teammate: the orthodontic mouthguard. It protects your lips and gums from sharp brackets during games.
Musicians—especially brass or wind players—may need a little adjustment period. A thin layer of orthodontic wax on the brackets can help ease friction while you play.
20. Traveling with Braces: What to Pack
Heading on a trip? Toss these essentials into a small pouch:
- Travel toothbrush and mini toothpaste
- Orthodontic wax
- Pocket-size mouth rinse
- Floss threaders or a small water flosser
Trust me, you’ll feel way more relaxed knowing you’re prepared for on-the-road mishaps.
Long-Term Care and Motivation
21. Tracking Your Progress: Why It’s Worth It
Take monthly photos of your smile—side profile, front, even goofy ones if you want. It’s amazing to see how far you’ve come when motivation dips. Progress photos often keep patients from feeling discouraged during slower phases of treatment.
22. Follow-Up Appointments: Don’t Skip Them
Skipping a follow-up appointment is like missing your cardio day at the gym—sounds harmless but slows progress big time. Each visit keeps your teeth moving as planned and prevents small issues from snowballing.
23. Retainers: The Unsung Heroes After Braces
When your braces come off, you’ll want to throw a party—go for it. But don’t ditch your retainers. Wearing them as instructed is the only way to keep your teeth from shifting back. Clean them gently with a soft toothbrush (no hot water, unless you want a warped retainer disaster).
24. Managing Expectations for the Final Reveal
Braces can deliver a stunning transformation, but they’re not magic wands. Teeth may not look Hollywood-perfect on day one, especially if there’s natural variation in tooth shape or size. Your orthodontist may suggest cosmetic tweaks later (like whitening or bonding) to polish off your look.
25. Patience Pays Off—Your Smile Journey Recap
Braces teach patience, period. Some days you’ll feel over it—tight wires, food restrictions, sore spots. But remember why you started: a healthy, confident smile that lasts a lifetime. Keep your eye on the prize; the effort will be worth it.
Conclusion
So there you have it—25 essential things I wish every patient knew before starting braces. From stocking up on orthodontic wax to carrying that mini mouthwash like a badge of honor, these little steps make the whole process smoother.
As a dentist, I’ve watched hundreds of patients transform not just their smiles but their confidence, and IMO, that’s priceless.
Sure, there will be moments when you wonder why you signed up for this (usually while fishing out popcorn from your brackets), but stick with it—your future selfie will thank you. 🙂
Bottom line: prep well, keep up with hygiene, lean on your ortho team for advice, and embrace the quirks along the way. Because nothing—and I mean nothing—beats the grin you’ll flash on the day those brackets finally come off.

Dr. Pallab Kishore, MS in Orthodontics and owner of Orthodontic Braces Care, shares expert tips on braces, aligners, and oral health from 10+ years of experience.